Author Topic: Scratch-built locks  (Read 57287 times)

Offline Keb

  • Hero Member
  • *****
  • Posts: 1193
  • south Ohio
Re: Scratch-built locks
« Reply #100 on: January 18, 2012, 05:21:42 PM »
I have plugged a main spring hole to use a different tumbler with a fly & bigger spring on one of these.


The plug is nearly invisible behind the firzzen spring and the lock functions acceptable now.

Offline James Wilson Everett

  • Hero Member
  • *****
  • Posts: 1107
Re: Scratch-built locks
« Reply #101 on: January 19, 2012, 12:32:42 AM »
Guys,

This is a reply to a message I received on how the tumbler mill was made.  First, I adapted it from one illustrated in the Journal of Historical Armsmaking Technology, Volume I, page 36 that was made for use at the Colonial Williamsburg gunshop.  To mine I added several different size holes to be used as "field or shade tree" screw shank grinders.  They are mostly in the plate that is behind in the photo so just a few are visible.

I placed a new fine cut mill file in an oven and heated to 1500F and allowed to furnace cool.  This fully annealed the file.  I then cut the soft file into two sections and glued them together using Elmer's glue.  This allowed me to stack drill all holes that were required to be aligned in the finished tool, the two bolt holes and the three tumbler holes.  After the holes were drilled  I separated the two pieces with hot water.  Next I reamed the holes for the larger shaft of the tumblers and I drilled various sizes of screw shank grinder holes.  When all the holes were finished I again heated the two pieces to 1500 and quenched in brine.  Add the bolts, nuts & spacers and the thing is finished.

Jim Everett

dannybb55

  • Guest
Re: Scratch-built locks
« Reply #102 on: January 19, 2012, 12:36:16 AM »
Jim, The way to get a square edge is to leave that are twice as thick, if the plate is 3/ 16ths leave 1/2 in where the bend will be. When you forge it over on the vice chaps you can back it up a little to get the sharp edge and maybe go ahead and fuller the pan recess too. My forge is back up so I am going to give it a go.
 I just got my second post vice in the mail yesterday, now I have one for hot work and one for cold.
                                                              Danny

Offline flintriflesmith

  • Hero Member
  • *****
  • Posts: 1509
    • Flintriflesmith
Re: Scratch-built locks
« Reply #103 on: January 19, 2012, 01:16:50 AM »
When I tried leaving some metal and bending the pan over I found it VERY difficult to get a sharp outside corner --- not on the pan and bolster but on the pan fence.

That is why I started examining the grain structure in rusted relics of original locks and discovered that at least some of them had the pan butt welded on to the plate. The "grain" of the iron in the pan ran at 90 degrees to the grain in the plate and bolster.

I also believed that welding on the pan was less wasteful of material and way quicker than filing away the excess iron required to get a sharp corner by bending. One of the best lessons I learned from Master Blacksmith John Algood was "Five minutes at the forge can save you five hours with the file." I never got that good at forging but the skilled guys who do it all the time can forge circles around most gunsmiths of today.
"If you accept your thoughts as facts, then you will no longer be looking for new information, because you assume that you have all the answers."
http://flintriflesmith.com

dannybb55

  • Guest
Re: Scratch-built locks
« Reply #104 on: January 19, 2012, 02:23:54 AM »
Do ya'll think that the smith shaped the pan on the end of a bar and butt welded the pan to the plate?

Offline James Wilson Everett

  • Hero Member
  • *****
  • Posts: 1107
Re: Scratch-built locks
« Reply #105 on: January 19, 2012, 05:18:41 AM »
Guys,

When I forge weld the pan onto the plate the rod that becomes the pan is much oversized.  After welding there is a lot of cutting back to the final dimensions.  I guess I am guilty of spending the five hours with the file.  The thing is that the pan fence will have a lot less mass than the pan body, so if the pan were to be closer to its final shape, then the thin pan fence section would melt away before the heavier pan body is hot enough to weld.  It always seems to be easier to weld when both pieces have about the same mass.  Welding a little piece to a big piece is much harder.  Welding a pan onto the lockplate bolster with that little skinny pan fence already formed would be most difficult, at least for me.  As you all can see in the photos, my weld is imperfect anyways.

Jim Everett

Offline flintriflesmith

  • Hero Member
  • *****
  • Posts: 1509
    • Flintriflesmith
Re: Scratch-built locks
« Reply #106 on: January 22, 2012, 12:37:02 AM »
I just posted some copies of Volume 1 of JHAT (1985) in the for sale section. It includes a section on welding the pan on an English style lock. Lots about the period tools as well.
Gary
"If you accept your thoughts as facts, then you will no longer be looking for new information, because you assume that you have all the answers."
http://flintriflesmith.com

Offline James Wilson Everett

  • Hero Member
  • *****
  • Posts: 1107
Re: Scratch-built locks
« Reply #107 on: October 08, 2012, 03:49:47 AM »
Guys,

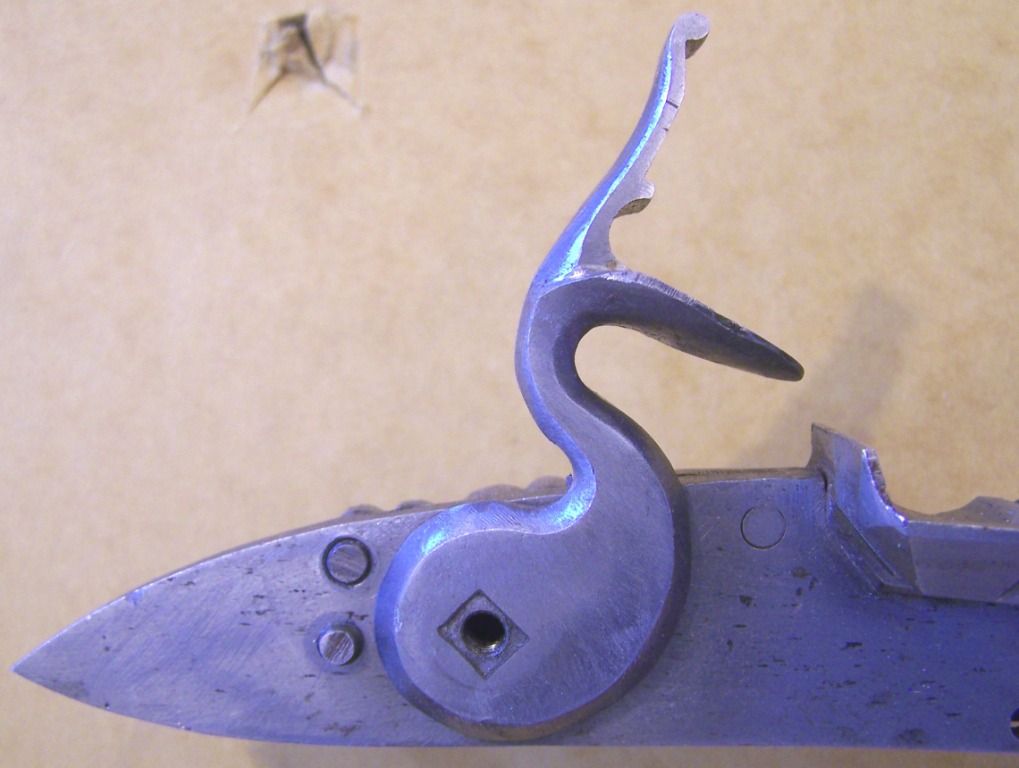
Here is a short summary on how to get the cock properly positioned.  Positioning the tumbler lip, tumbler square, cock shoulder and cock position all at the same time it can be like juggling 4 balls in the air.  First here is a photo of the before & after of the forged wrought iron cock, notice that I drill the pivot hole in the proper location to set the throw length, then file the metal to center around the existing hole.
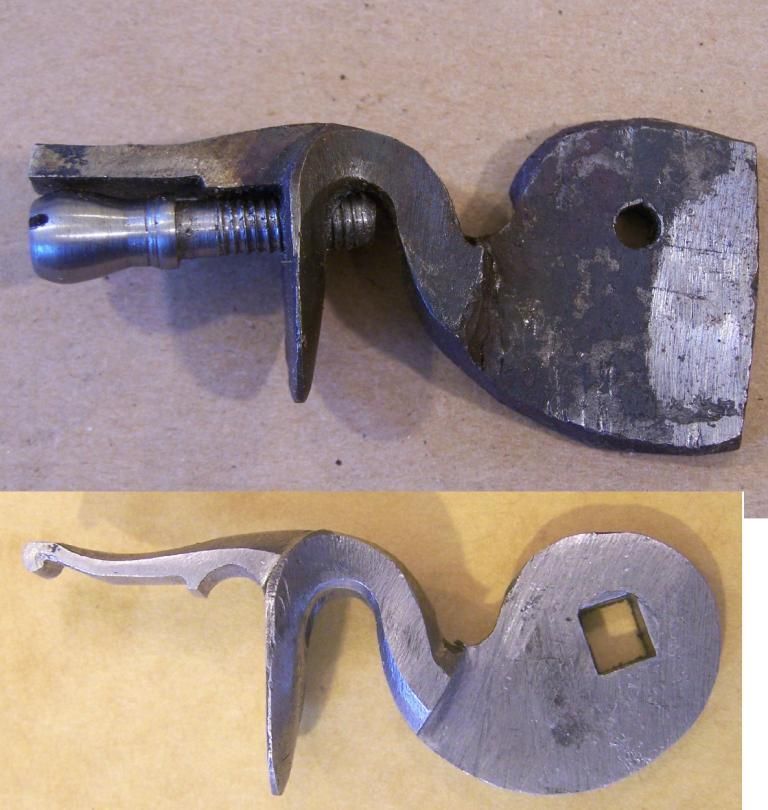
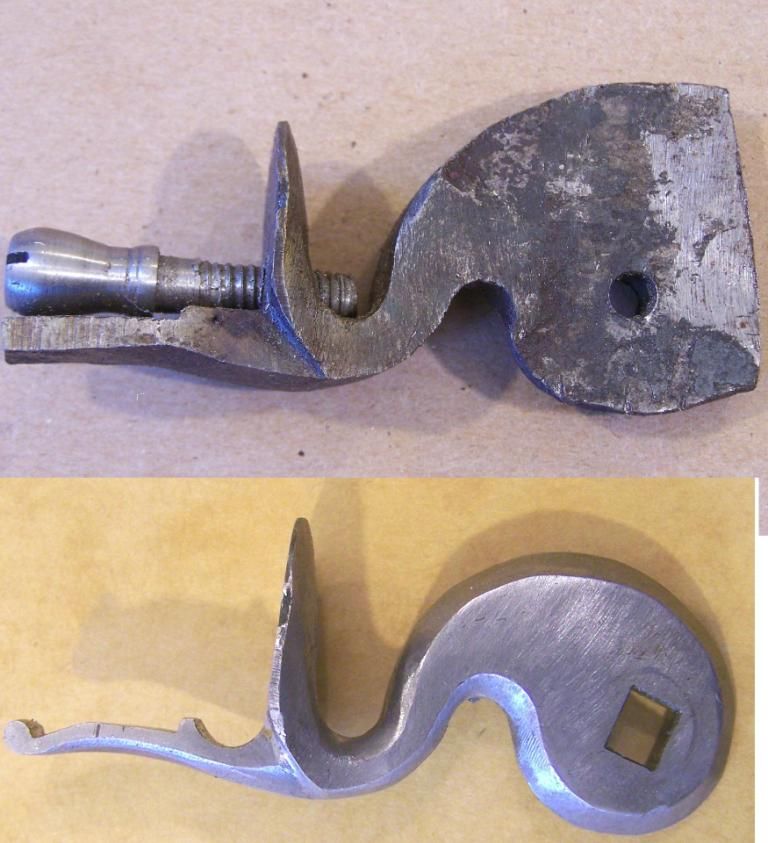


I do not finish the cock interior shoulder, the one that hits the top of the lock plate, until the very end.  I install the cock on the tumbler square at my best guess of the proper orientation, but since the cock shoulder is unfinished the installed cock would sit at about the half cock position  Then I gradually file the shoulder back until the cock rotates to a proper hammer down position.  With the mainspring in palce I allow the cock to rotate forward until the toe of the mainspring is just at the end of travel on the tumbler lip.  In the case of this lock the mainspring to tumbler position is good, but the cock is still slightly far back from the pan.  However, this would not effect lock operation.  I never have done anything perfectly.
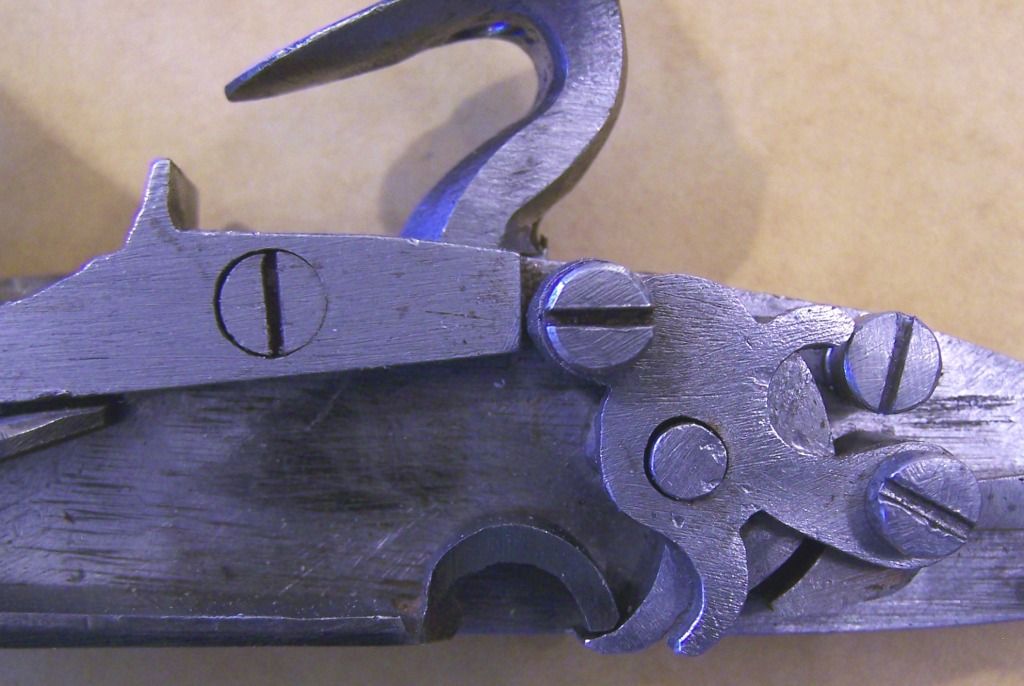


Bottom line -  when you forge a cock, leave the cock interior shoulder way too big, then file it back until everything is happy.

Jim
« Last Edit: December 10, 2019, 12:41:56 AM by James Wilson Everett »

Offline Jim Kibler

  • Hero Member
  • *****
  • Posts: 4513
    • Personal Website
Re: Scratch-built locks
« Reply #108 on: October 09, 2012, 01:26:07 AM »
I like to have the internals set up first then worry about positioning the cock.   A method for this that has worked well for me is to drill a hole in the cock just big enough for the tumbler screw.  Tin the back side of the cock with a layer of soft solder.  Screw the cock to the tumbler in the proper rest position.  Smack the cock with a hammer and a piece of pipe or wood that fits over the tumbler screw.  This will leave a square mark in the soft solder layer.  You can then drill the hole bigger and file it square to the mark.  You can also drill the hole full size to start and then make up a thin businging to center the tumbler screw in.

Online rich pierce

  • Administrator
  • Hero Member
  • *
  • Posts: 19634
Re: Scratch-built locks
« Reply #109 on: October 09, 2012, 01:30:19 AM »
That is an excellent tip, one for the shop notebook.
Andover, Vermont

Offline Jim Kibler

  • Hero Member
  • *****
  • Posts: 4513
    • Personal Website
Re: Scratch-built locks
« Reply #110 on: October 09, 2012, 01:41:17 AM »
Should give credit for this.  I believe I heard it here quite a while ago from Jerry Huddleston.

Offline Bubblehead

  • Starting Member
  • *
  • Posts: 12
Re: Scratch-built locks
« Reply #111 on: July 16, 2022, 04:27:37 PM »
(bringing yet another 10 year old topic back from the dead) Any chance for picture recovery on this thread?

Offline James Wilson Everett

  • Hero Member
  • *****
  • Posts: 1107
Re: Scratch-built locks
« Reply #112 on: July 17, 2022, 09:40:53 PM »
Guys,

I worked to recover the photos from the internet heaven, or wherever they went.

Jim