Author Topic: Making a gunlock  (Read 117380 times)

Offline James Wilson Everett

  • Hero Member
  • *****
  • Posts: 1091
Making a gunlock
« on: June 06, 2013, 02:02:09 PM »
Guys,

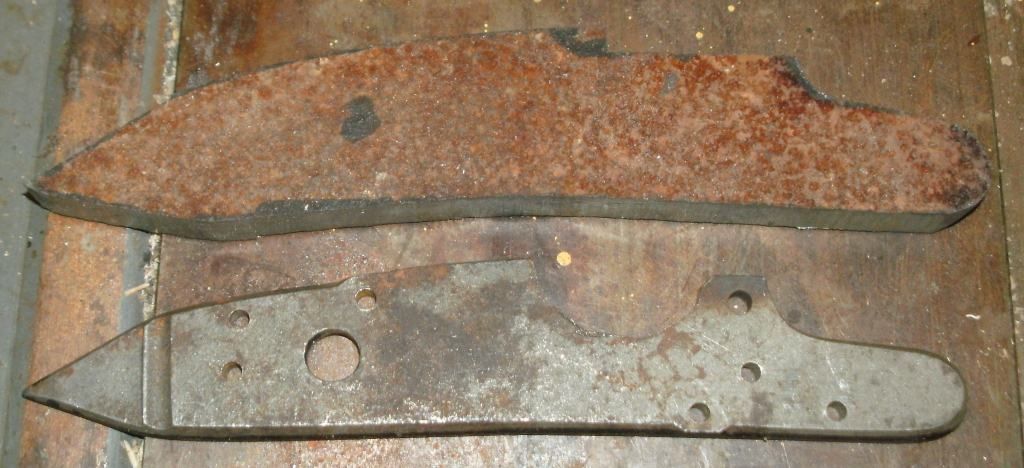
Since I finished my little Lehigh gun, it is time to start over.  Here is how I start to make the flintlock.  First I decide on the general style, in this case an early German lock the size of the large Siler, but with a bit more curve or droop in the rear part of the lockplate.  This lock will have a detachable flashpan.  Original lockplates were made from wrought iron and rarely brass.  So this lock starts with a wrought iron barn hinge.  This photo shows the barn hinge and a Siler lockplate that I use as a pattern.


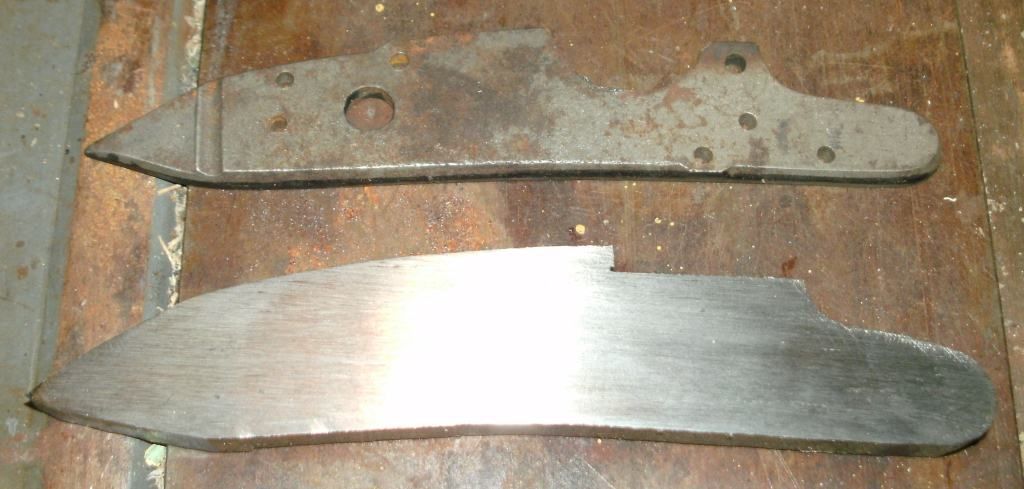
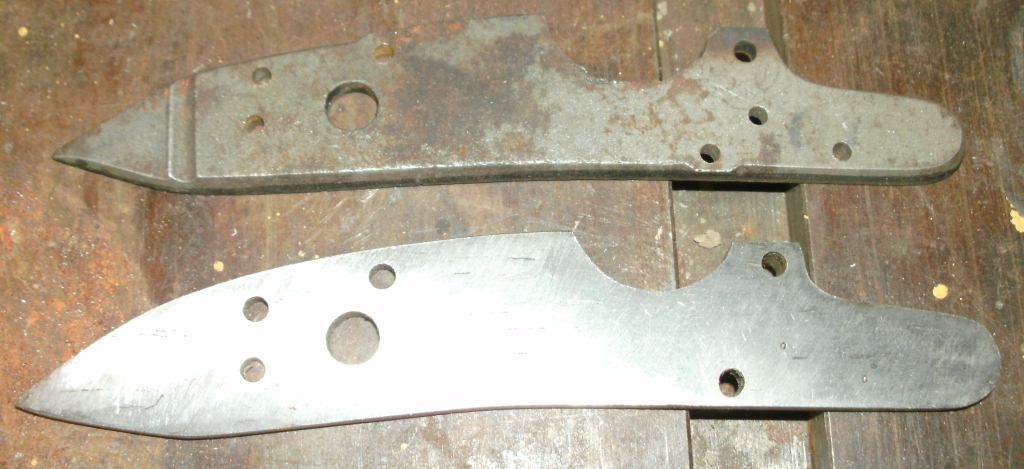
I marked around the Siler plate giving more of a droop to the rear and cut the blank out with a hacksaw and grinder.  Here is the blank along with the pattern.


The next step is to smooth the outer surface, done with files starting with an 18" coarse tooth file this work is quick.  A finer tooth file is used to smooth the surface.  Removing a large amount of metal with the fine tooth file is a really long chore.  If you want to actually make a gun, get some "big boy" files.


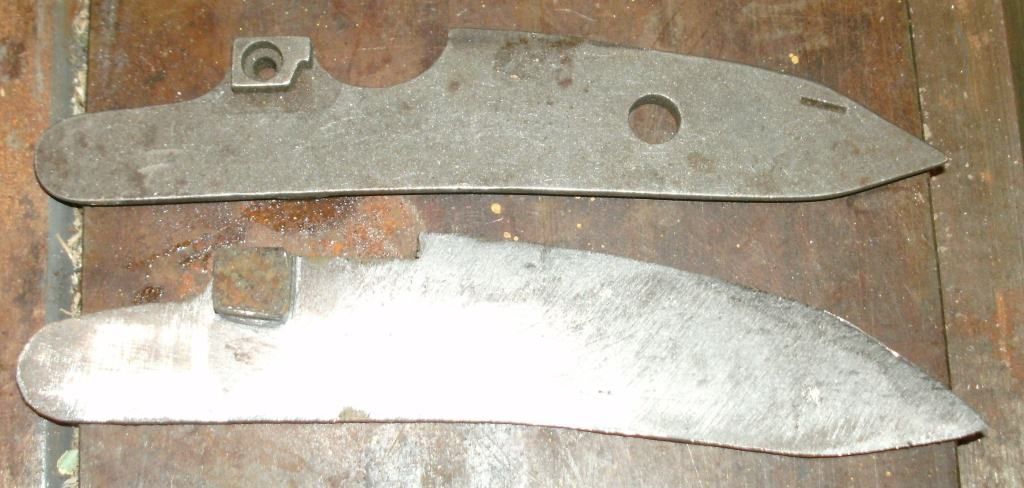
Now the backside of the lockplate is filed flat but leaving the lump of metal to anchor the detachable pan.  Filing around the lump is a bit more troublesome than the flat outer surface, but if you use the correct coarse big file it doesn't take long.


The next step is to mark the locations of the lockplate holes for drilling.  Here is where the Siler pattern really shines.  You simply center punch through the holes in the Siler pattern to get a good location.  In this case I marked the tumbler hole and forward holes, then slightly repositioned the pattern for the droop and punched the rear holes.


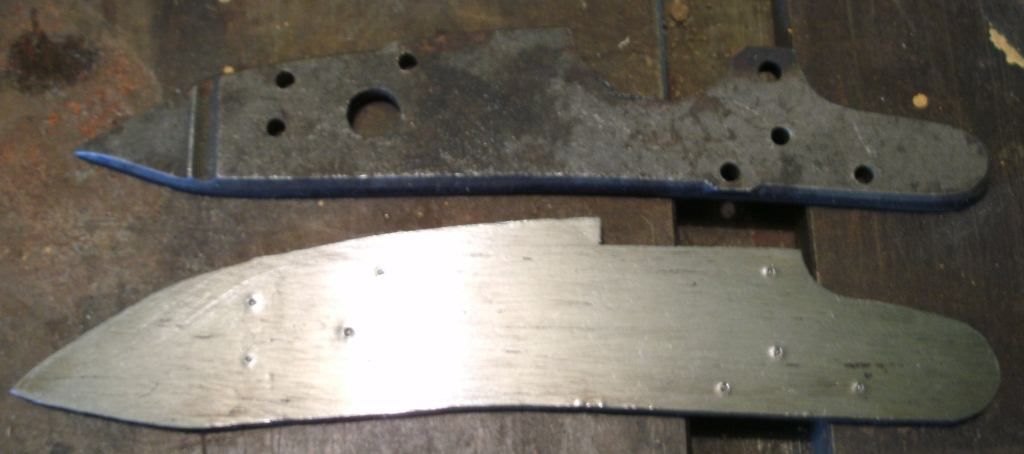
Now the lockplate holes are drilled on the center punch locations.  I did this with modern twist drills as the visitor crowds were not looking over my shoulder.  Also, you can see the cutout for the detachable pan.


Here I have to stop the work for several months as I have an overseas assignment, so this will be continued later.

Jim
« Last Edit: November 27, 2019, 07:49:41 PM by James Wilson Everett »

Offline PPatch

  • Hero Member
  • *****
  • Posts: 2456
Re: Making a gunlock
« Reply #1 on: June 06, 2013, 02:07:19 PM »
A good beginning James, will be interesting to watch your progress.

dave
Dave Parks   /   Quis custodiet ipsos custodes?

Offline rich pierce

  • Administrator
  • Hero Member
  • *
  • Posts: 18914
Re: Making a gunlock
« Reply #2 on: June 06, 2013, 03:31:03 PM »
You're an amazing filer!  Wow, removing all the metal from the backside that way is impressive.  Given your skill at the forge I'd have thought you'd rough forge the lockplate but this probably helps keep it all flat.
Andover, Vermont

Offline Acer Saccharum

  • Administrator
  • Hero Member
  • *
  • Posts: 19311
    • Thomas  A Curran
Re: Making a gunlock
« Reply #3 on: June 06, 2013, 03:42:05 PM »
James, I, too, have to wonder at the 'correct coarse big file'.  To me, it would be a Bridgeport.
Tom Curran's web site : http://monstermachineshop.net
Ramrod scrapers are all sold out.

pushboater

  • Guest
Re: Making a gunlock
« Reply #4 on: June 06, 2013, 06:31:23 PM »
I just went through a similar process making the lock for my Swivel Breech, only not near as involved on the backside.  You are truly a master of the file!  I'm looking forward to the rest of the tutorial.  Thanks

Capt. David

Offline chris laubach

  • Sr. Member
  • ****
  • Posts: 273
  • Marietta, Pa
Re: Making a gunlock
« Reply #5 on: June 06, 2013, 06:40:05 PM »

Do I understand you correctly.....When you say you file the back to re leave the lug for the pan?
Basically stock removal??


C.Laubach

Offline smylee grouch

  • Hero Member
  • *****
  • Posts: 7668
Re: Making a gunlock
« Reply #6 on: June 06, 2013, 07:44:00 PM »
This looks to be an education for me as I would have thought you would have spoted and drilled all the holes first, then cut out the outside shape of the lock. As I said, it will be an education for me. I assumed that because I thought you already had the lock internals made or on hand from some other lock.

Offline James Wilson Everett

  • Hero Member
  • *****
  • Posts: 1091
Re: Making a gunlock
« Reply #7 on: June 06, 2013, 08:19:59 PM »
Guys,

Good questiions.  Yes, on this lock the barn hinge was thick enough to allow for the lump to remain at full thickness and all the rest of the stock was filed away.  Not really a hard job with the right tools.  I find that when filing the old wrought iron the outer rusty crust is rather hard and difficult to file, but once you get to clean metal it is a lot easier to file.  The rough files are half round coarse cut files of 16" and 18" long.  They really do move the wrought iron quickly.  It actually takes more time with the smooth files to get the surface truly flat.

I drill the holes after the flat surfaces are established, square and flat.  In most machining operations you should establish a true baseline or datum from which all other operations are measured.  In this case the inner and outer surfaces are filed flat and square before drilling the holes.  The next step will be to make and install the detachable pan - roughly.  The upper surface of the pan is not finished until after the frizzen is installed.  I find it easier to file the pan surface to mate with the frizzen bottom than vise-versa.  The internals come later, I have not made any yet.

Jim
« Last Edit: November 27, 2019, 07:50:16 PM by James Wilson Everett »

Offline Rolf

  • Hero Member
  • *****
  • Posts: 1736
  • There's more than one way to skin a cat.
Re: Making a gunlock
« Reply #8 on: June 06, 2013, 11:13:22 PM »
Thank you for taking the time to do this tutorial. I look forward to the next chapter. A lot to learn here.

Best regards
ROlf

Offline JTR

  • member 2
  • Hero Member
  • ****
  • Posts: 4218
Re: Making a gunlock
« Reply #9 on: June 07, 2013, 03:23:13 AM »
Stay safe on your trip Jim, and send us some pictures if you have the chance!
Look forward to you when you get back!
John
John Robbins

Offline David R. Pennington

  • Hero Member
  • *****
  • Posts: 2886
Re: Making a gunlock
« Reply #10 on: June 07, 2013, 05:13:17 AM »
Thanks Jim, I always look forward to your posts.
VITA BREVIS- ARS LONGA

Offline D. Taylor Sapergia

  • Member 3
  • Hero Member
  • *
  • Posts: 12548
Re: Making a gunlock
« Reply #11 on: June 07, 2013, 08:39:45 PM »
I find holding onto an irregular shaped piece of iron rather frustrating.  How do you do it, James?
D. Taylor Sapergia
www.sapergia.blogspot.com

Art is not an object.  It is the excitement inspired by the object.

Offline dogcreek

  • Full Member
  • ***
  • Posts: 174
Re: Making a gunlock
« Reply #12 on: June 08, 2013, 12:17:45 AM »
This is very interesting. I'm looking forward to watching as you progress.

Offline James Wilson Everett

  • Hero Member
  • *****
  • Posts: 1091
Re: Making a gunlock
« Reply #13 on: June 08, 2013, 05:34:39 AM »
Guys,

Now to work on the detachable pan.  I start with a section of wrought iron buggy wheel rim.  The pattern is a modern made casting of a detachable pan, there is really a lot of iron to be removed from this lump.


The lump is roughly squared and cut to a very general outline of the part.


You have to be careful to cut the pan groove to fit tightly on the lockplate, a somewhat tedious job to do right.


Gradually the pan is worked onto the lock plate so that the groove is tight on both the inner and outer surfaces of the lockplate and the toe is tight under the lip of the bolster.


Once the rough pan is tight on the lockplate the final shaping of the pan can start, that is for next time.  I know it is ugly now, but it should be better looking later on.

Jim
« Last Edit: November 27, 2019, 07:55:36 PM by James Wilson Everett »

Offline David R. Pennington

  • Hero Member
  • *****
  • Posts: 2886
Re: Making a gunlock
« Reply #14 on: June 09, 2013, 10:39:01 PM »
This is like the old cliff hanger serials, can't wait for the next one.
VITA BREVIS- ARS LONGA

raszpla

  • Guest
Re: Making a gunlock
« Reply #15 on: June 10, 2013, 12:53:03 PM »
nicely :)

Offline Acer Saccharum

  • Administrator
  • Hero Member
  • *
  • Posts: 19311
    • Thomas  A Curran
Re: Making a gunlock
« Reply #16 on: June 10, 2013, 06:13:19 PM »
How did you cut that groove, Mr Smarty-pants? :)

Thanks for posting these neat pictures of your process! This is terrific material.
« Last Edit: June 10, 2013, 06:13:57 PM by Acer Saccharum »
Tom Curran's web site : http://monstermachineshop.net
Ramrod scrapers are all sold out.

Meteorman

  • Guest
Re: Making a gunlock
« Reply #17 on: June 10, 2013, 09:16:45 PM »
Lordy that's a deal of filing.
You must have forearms like Popeye.
After we see all this, it might be an opportune time for Jim Chambers to double his prices !

Seriously now, thanks for taking the time to do this, Jim - I'm looking forward to the rest of it.

/mike millard

Offline whitebear

  • Hero Member
  • *****
  • Posts: 837
Re: Making a gunlock
« Reply #18 on: June 10, 2013, 10:04:12 PM »

After we see all this, it might be an opportune time for Jim Chambers to double his prices !

/mike millard

SHHHHH, Mike don't give Jim any Ideas.
In the beginning God...
Georgia - God's vacation spot

Offline Acer Saccharum

  • Administrator
  • Hero Member
  • *
  • Posts: 19311
    • Thomas  A Curran
Re: Making a gunlock
« Reply #19 on: June 10, 2013, 11:18:32 PM »
I'd like to see everyone stay in business. Locks are a deal compared to what they used to cost when they were all hand made.
Tom Curran's web site : http://monstermachineshop.net
Ramrod scrapers are all sold out.

Offline Jim Kibler

  • Hero Member
  • *****
  • Posts: 4296
    • Personal Website
Re: Making a gunlock
« Reply #20 on: June 11, 2013, 01:48:35 AM »
Might be fun to study some old locks in detail and use them for a guide rather than the Siler.  As popular as it has been over time, the original stuff is hard to beat.  The Siler has stood the test of time as well as anything in this field made so long ago, but it still can be improved upon a bit in terms of design and aesthetics in my view.  Plus it's neat to have something quite different.  Just my thoughts and something perhaps to consider.

Offline James Wilson Everett

  • Hero Member
  • *****
  • Posts: 1091
Re: Making a gunlock
« Reply #21 on: June 11, 2013, 11:39:28 PM »
Guys,

Thanks for the good comments.  The groove in the rough detachable pan is cut with a simple 6 inch fine cut mill file.  Nothing special here.  The pan is inlet to the lockplate using the typical candle blacking fit & file process.  When you make a gunlock like this you really appreciate the wonderful skills the oldtimers had.  Also, you feel how terrifically inexpensive a $150 flintlock really is.  Not only is a Chambers lock amazingly inexpensive, it is a lot better quality that the locks I am able to make.

Jim

eddillon

  • Guest
Re: Making a gunlock
« Reply #22 on: June 12, 2013, 12:06:15 AM »
Jim,
Great work!  Can't wait to see the next series of photos for this project.

eddillon

  • Guest
Re: Making a gunlock
« Reply #23 on: June 12, 2013, 12:08:20 AM »
nicely :)
Raszpla, 
When will you have more pictures of your wheel lock project?

raszpla

  • Guest
Re: Making a gunlock
« Reply #24 on: June 12, 2013, 12:53:47 AM »