Author Topic: Making a silver front sight, a tutorial  (Read 16208 times)

Offline E.vonAschwege

  • Global Moderator
  • Hero Member
  • *
  • Posts: 3118
    • von Aschwege Flintlocks
Making a silver front sight, a tutorial
« on: December 14, 2013, 08:46:08 PM »
Hey Folks,
   With the latest couple pistol projects finished (to be posted in the next week or two), I'm spending some time updating my website and adding tutorials as I go.  A couple weeks ago I added a tutorial about red violin varnish on Lehigh valley arms, and last night I put together a quick bit about making a custom front sight for round muzzle barrels.  The link for my page is here: http://www.neahkahnieflintlocks.com/silver-front-sight.html but I'll copy and paste the info and photos into the site here as well.  Hope you find this enjoyable, or at least somewhat useful  ;)

When looking at other gunsmiths' work, I usually find it is the small custom parts that often set my favorite pieces apart from the rest.  I think it's well worth it to take the time to make a part look authentic and make the gun really "pop" (to borrow the word from Allen Martin).   

I use silver sheet from Rio-Grande, about .04" thick, but an old silver coin pounded thin will work as well.  I use "easy" silver solder along with Stay-Silv flux, which melts at a low enough temperature for a standard propane torch to take care of. 


Cut out a piece of silver, wider at one end than the other by 1/8" to 3/16".  Polish the face to remove any oils and mark the centerline.
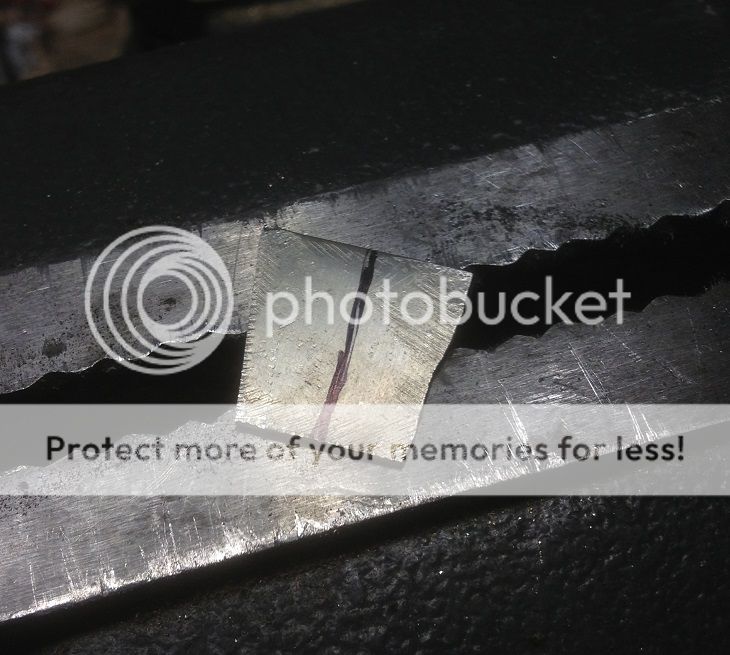


Using a hand vise with minimal teeth, clamp one half of the sight in the vise.  Tap over one side until you have a sharp 90 degree angle.
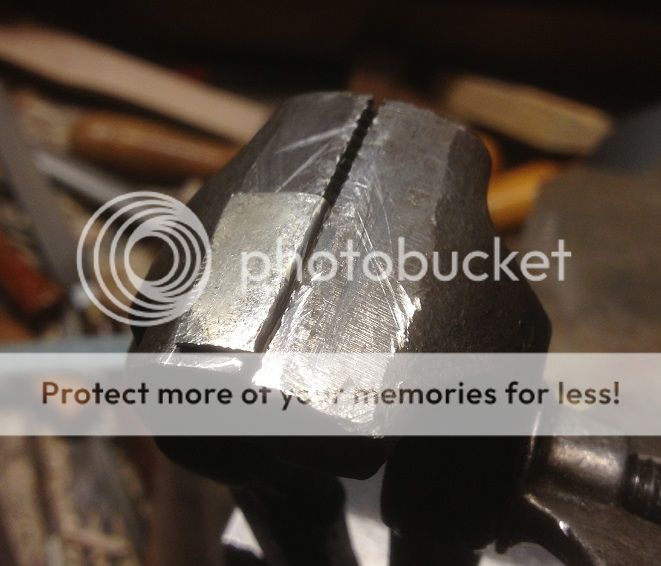


Use a borox based silver solder (also called silver brazing) flux to coat the inside of the angle.


Fold the sight together and hammer tight - most of the brazing flux will shoot out, so make sure it doesn't get on anything important.  Be sure there is no gap at the fold.
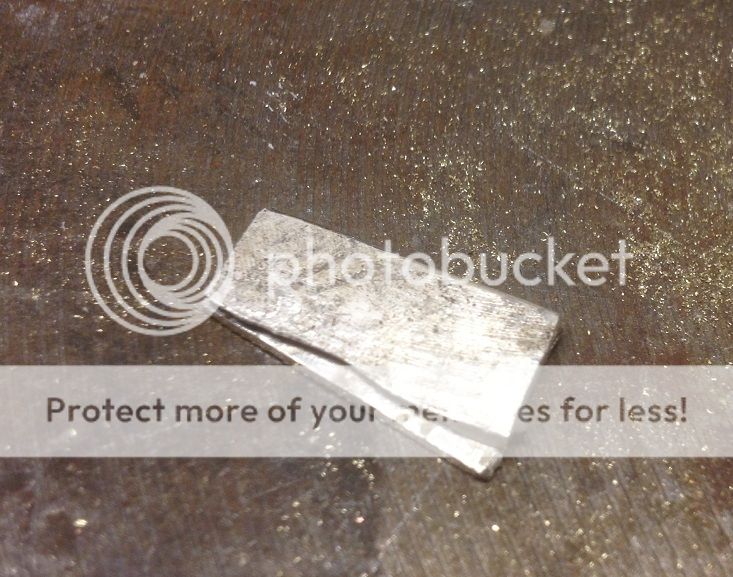


Place the sight back in your hand vise (held by a bench vise), with the wide end a little lower to form the rear of the sight.  Fold over both sides tight to the vise, then hammer to form a tight flat base.  Don't worry about the small groove down the middle.  We'll take care of that when we braze it. 
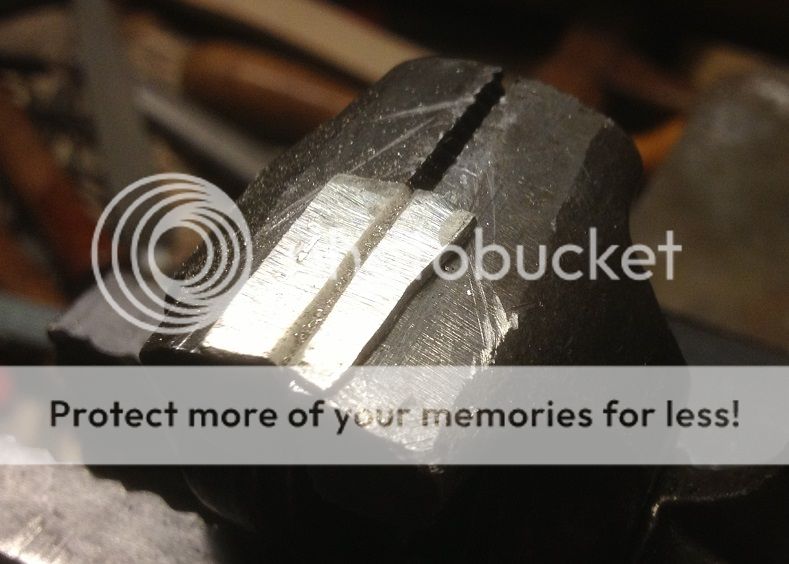


Take the sight in a needle nose or forceps, then lay a length of wire in the groove.  Braze the sight together with a propane torch, using extra silver brazing wire to puddle in the groove. 



You can see the sight beginning to take shape.  After the piece is brazed, place it in vinegar to soften the hardened flux, then place it back in the vise.  Wedge a screwdriver on either side of the blade to pry up slightly the tabs, which we will now fit to the barrel.  Draw your profile and base on the piece with sharpie, then file it. 


Use a file with the approximately the same radius as your barrel, then file the sight to fit.  Be careful to keep the sight blade in line with the file, or you'll have a sight that wants to sit crooked on the barrel.  If you puddled the silver wire correctly then the gap should disappear entirely.  You can shape the sight blade at this stage, but it's easier to leave it rough and shape it once installed on your barrel.
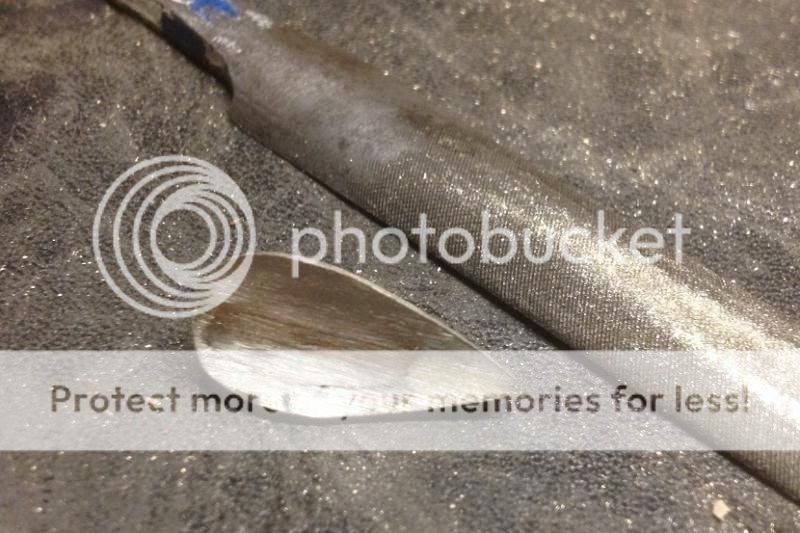


Though the photo is not shown, at this point I "tin" the sight by putting a thin coating of low-temp plumbing solder on the base - this makes it easier for the sight to bond with the barrel.  Clean and degrease your barrel, then locate where you want the sight.  In the image, I have wired the front barrel tab in order to prevent it from moving, should I accidentally use too much heat and melt the solder holding it in place.  The brass is bent down and held at the breech with a clamp, making a spring to pin the sight to the barrel. 



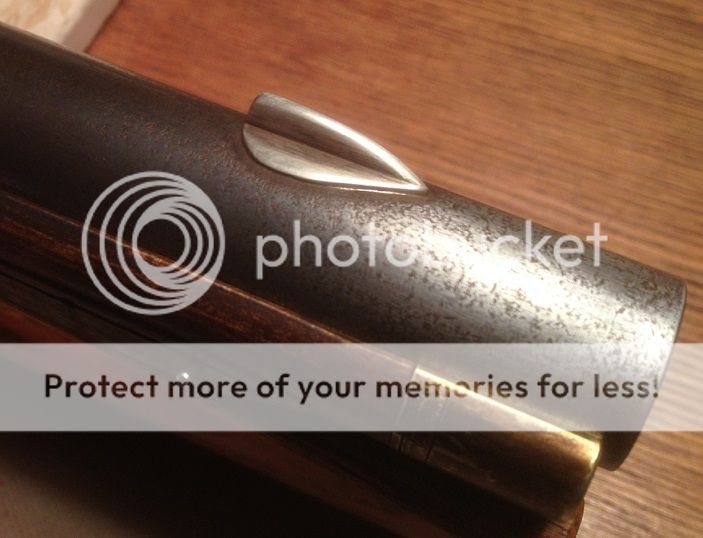
Clean up the sight and shape the way you like.  This pistol inspired by Kuntz and Rupp has a long and low blade that fares into the barrel at the nose.  The base can be filed thinner and fared into the barrel.  The braze joint should be invisible now as you file into it to shape the top of the blade. 


« Last Edit: January 13, 2020, 05:54:07 PM by rich pierce »
Former Gunsmith, Colonial Williamsburg www.vonaschwegeflintlocks.com

Offline Acer Saccharum

  • Hero Member
  • *****
  • Posts: 19311
    • Thomas  A Curran
Re: Making a silver front sight, a tutorial
« Reply #1 on: December 14, 2013, 10:43:13 PM »
Very nice, Mr Wege. May I move this to 'tutorials' after it has gotten some review here?
Tom Curran's web site : http://monstermachineshop.net
Ramrod scrapers are all sold out.

Offline Jim Kibler

  • Hero Member
  • *****
  • Posts: 4474
    • Personal Website
Re: Making a silver front sight, a tutorial
« Reply #2 on: December 14, 2013, 11:01:25 PM »
Nice tutorial and your website looks great as well.  Good stuff.

Thanks,
Jim

Offline Rolf

  • Hero Member
  • *****
  • Posts: 1764
  • There's more than one way to skin a cat.
Re: Making a silver front sight, a tutorial
« Reply #3 on: December 15, 2013, 12:29:15 AM »
Very nice tutorial. But, could you include how you find the top of a round barrel ? I've tried eyeballing and that drives me nuts.

Best regards
Rolf

Offline Tim Crosby

  • Administrator
  • Hero Member
  • *
  • Posts: 18390
  • AKA TimBuckII
Re: Making a silver front sight, a tutorial
« Reply #4 on: December 15, 2013, 01:13:36 AM »
 Well done Eric, easy to follow and good clear pix.

   Tim C.

Offline Kermit

  • Hero Member
  • *****
  • Posts: 3099
Re: Making a silver front sight, a tutorial
« Reply #5 on: December 15, 2013, 03:16:11 AM »
Well done, Eric. Even I could follow this. :D

BTW, where are you hanging your hat and sharpening your tools these days. I notice your website has info forthcoming.
"Anything worth doing is worth doing slowly." Mae West

Offline E.vonAschwege

  • Global Moderator
  • Hero Member
  • *
  • Posts: 3118
    • von Aschwege Flintlocks
Re: Making a silver front sight, a tutorial
« Reply #6 on: December 15, 2013, 06:25:38 AM »
Very nice tutorial. But, could you include how you find the top of a round barrel ? I've tried eyeballing and that drives me nuts.

Best regards
Rolf


Rolf - good question!  The way that works for me (which IS technically eye-balling I suppose), is the same technique that cabinet makers use to see if a board is warped at all.  I use two straight files.  Lay one on the tang, which should be flat even on an all-round barrel.  Next, sight down the barrel and hold a file near the muzzle - line the two of them up as sighting sticks and draw the file up and down the barrel in the location you want the rear sight, while keeping it in line with the rear file.  You'll have a slight mark where the top center of the barrel should be.  I'll see if I can take a photo tomorrow to better illustrate my view.  

Kermit - I'm between Portland, OR and Nahant, MA.  Nahant is my hometown, and Portland is strictly temporary.  Will probably be relocating more permanently in the next few months back to New England, perhaps North Shore MA or southern Maine. 
-Eric
« Last Edit: December 15, 2013, 06:27:53 AM by EvonAschwege »
Former Gunsmith, Colonial Williamsburg www.vonaschwegeflintlocks.com

Offline B.Habermehl

  • Hero Member
  • *****
  • Posts: 1690
Re: Making a silver front sight, a tutorial
« Reply #7 on: December 15, 2013, 11:09:45 PM »
Reply for Rolf. If you are using a octagon to round barrel simply lay the barrel top down on a good flat surface slip a thin file under the muzzle end and hold the breech down and slide the barrel back and forth on the file, now you have a witness mark top dead center.  If you are using a round barrel leave the breech tang proud top and bottom, and use that as your indexing surface on the table. For your sight and lugs. BJH
BJH

Offline Long John

  • Hero Member
  • *****
  • Posts: 1618
  • Give me Liberty or give me Death
Re: Making a silver front sight, a tutorial
« Reply #8 on: December 16, 2013, 04:04:02 AM »
Eric,

Very nice tutorial, and the web-site is first class! 

Best Regards,

JMC

Offline Curtis

  • Hero Member
  • *****
  • Posts: 2338
  • Missouri
Re: Making a silver front sight, a tutorial
« Reply #9 on: December 16, 2013, 06:01:59 AM »
Great Tutorial Eric!  Thanks for sharing it.

Curtis
Curtis Allinson
~~~~~~~~~~~~~~~~~~~~~~~~~~~~~~~~~~~~~~~~~~~
Sometimes, late at night when I am alone in the inner sanctum of my workshop and no one else can see, I sand things using only my fingers for backing

Offline B Shipman

  • Hero Member
  • *****
  • Posts: 1928
    • W.G. Shipman Gunmaker
Re: Making a silver front sight, a tutorial
« Reply #10 on: December 18, 2013, 08:57:33 AM »
I've always used sterling silver front sights for 25 years without exception. Using folded stock. Works best in the woods, or with the light at your back or in your face. Dove tailed into an octagon (90%) or soldered on top. I don't use anything else.

Offline rich pierce

  • Administrator
  • Hero Member
  • *
  • Posts: 19538
Re: Making a silver front sight, a tutorial
« Reply #11 on: December 18, 2013, 07:10:52 PM »
Seems like on some original fowling pieces the front sight is inlayed into the barrel, much like a wedding band would be etc.  Anybody do that?
Andover, Vermont

Offline E.vonAschwege

  • Global Moderator
  • Hero Member
  • *
  • Posts: 3118
    • von Aschwege Flintlocks
Re: Making a silver front sight, a tutorial
« Reply #12 on: December 18, 2013, 10:27:22 PM »
For some European arms I've chiseled out a small groove about 20-30 thousands into the barrel and soldered a blade in.  The ones with "spider" sights look like the same technique, but likely peened into the barrel instead of solder.  I haven't built a gun of high enough caliber (pun intended  ;D) to do one of these yet. 
-Eric

Former Gunsmith, Colonial Williamsburg www.vonaschwegeflintlocks.com

Offline Dr. Tim-Boone

  • Global Moderator
  • Hero Member
  • *
  • Posts: 6538
  • I Like this hat!!
Re: Making a silver front sight, a tutorial
« Reply #13 on: December 19, 2013, 07:06:35 PM »
On one I did last year I did as Eric said. Chiseled the groove with undercut ends, cut the sight blade with a slight concave curve on the bottom so that I could just barely get it in the groove and then tapped it down spreading the ends tightly into the undercut ends of the groove. It holds very tightly.
De Oppresso Liber
Marietta, GA

Liberty is the only thing you cannot have unless you are willing to give it to others. – William Allen White

Learning is not compulsory...........neither is survival! - W. Edwards Deming