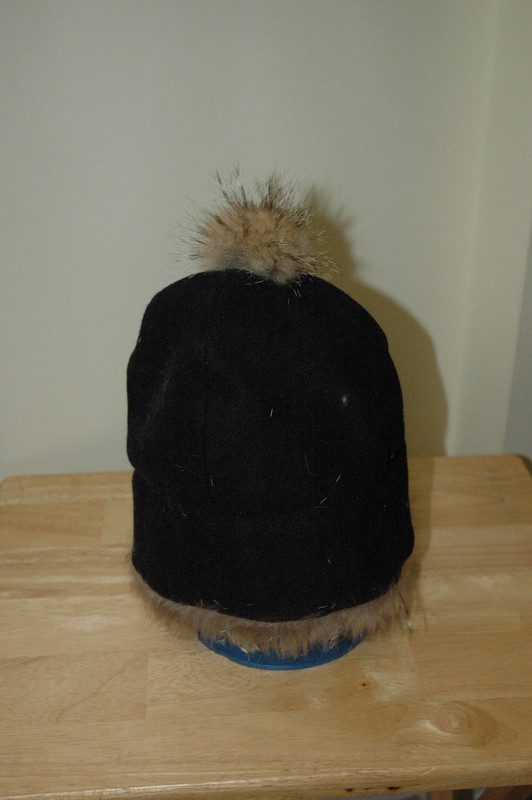
I made this cap decades ago and may well have followed Beth G's instructions. Be forewarned - the following is based on memory. It is sized for my 7 3/8 head and fits exactly as I would want when the fur is turned up. It is a little snug around the ears when turned down and I believe I would slightly flare out the bottom 3 inches of the outer fabric if I were to make another one - probably only about 1/16 inch per side on each panel.
To size the panels, measure the circumference of your head, divide by 4 and add your seam allowance. I likely added a 1/4" seam allowance. It is advisable to do a test fit by stitching together four panels of any reasonable weight fabric.
The lining is linen and the outer fabric is mid-weight wool.
To assemble, stitch together the four panels of each layer and press the seams flat. Then, tack the lining to the outer fabric at the peak and stitch around the lower edge of the lining using appropriately-colored thread. Stitch the ends of the fur strip together to make a tube. Stitch the tube along the lower edge of the outer fabric and then along the lower edge of the lining. In retrospect, I probably stitched the strip along the lower edge of the outer fabric and THEN stitched the ends together prior to stitching along the lining. Seems it would be an easier approach. Don't forget to turn and press the seam allowance along the lower edge of the outer fabric. I honestly can't remember how I made the tuft of fur, but it feels as though I cut a circular piece and drew the edges together prior to stitching to the hat. Turn the fur strip up and you are done.
Both the Canadian cap and workman's cap are very comfortable


