Author Topic: Christian's Spring rifle inspired by RCA #43- Photos Fixed  (Read 82960 times)

Offline David Rase

  • Hero Member
  • *****
  • Posts: 4309
  • If we need it here, make it here. Charlie Daniels
Re: Current project by Curtis - Christian's Spring rifle inspired by RCA #43
« Reply #75 on: November 08, 2016, 05:26:48 PM »
Good stuff, Curtis, well done!  Good idea about the Velcro....
Ed

Ed, your comment made me have to go back and look at the photos again.  That is a great idea.  That Curtis is a genius. 

Heck, on my next poor boy, why even inlet lugs and drill pin holes, I could just use Velcro.  ::)
David

« Last Edit: November 08, 2016, 05:28:31 PM by David Rase »

Online James Rogers

  • Hero Member
  • *****
  • Posts: 3150
  • James Rogers
    • Fowling Piece
Re: Current project by Curtis - Christian's Spring rifle inspired by RCA #43
« Reply #76 on: November 08, 2016, 06:42:16 PM »
You are a patient and giving man to provide this step by step for folk Curtis.
I am going to try that velcro trick.

Offline Curtis

  • Hero Member
  • *****
  • Posts: 2321
  • Missouri
Re: Current project by Curtis - Christian's Spring rifle inspired by RCA #43
« Reply #77 on: November 11, 2016, 07:17:15 AM »

Ed, your comment made me have to go back and look at the photos again.  That is a great idea.  That Curtis is a genius. 

Dave, it made me laugh out loud when I read that!  I would like you to do me a favor and try to convince my wife of that "fact" please!   :D

Heck, on my next poor boy, why even inlet lugs and drill pin holes, I could just use Velcro.  ::)
David


I can see a new west coast trend taking the nation by storm!


Ed and James, I think you will like the Velcro trick, it beats surgical tubing, leather thongs or any of the other stuff I have tried.

Curtis
Curtis Allinson
~~~~~~~~~~~~~~~~~~~~~~~~~~~~~~~~~~~~~~~~~~~
Sometimes, late at night when I am alone in the inner sanctum of my workshop and no one else can see, I sand things using only my fingers for backing

Offline hortonstn

  • Hero Member
  • *****
  • Posts: 650
Re: Current project by Curtis - Christian's Spring rifle inspired by RCA #43
« Reply #78 on: November 12, 2016, 12:15:11 AM »
curtis,
thank you for taking the time to write and photograph this, it is nice to see how other people
accomplish things that helps us build some nice rifles.
paul

Offline helwood

  • Full Member
  • ***
  • Posts: 147
Re: Current project by Curtis - Christian's Spring rifle inspired by RCA #43
« Reply #79 on: November 12, 2016, 05:07:14 AM »
Curtis sorry for not coming in a little sooner.  Here's my 2 cents on your screw to the barrel question.  A number of years ago had the opportunity to ask Wallace, after all the years that had passed from making the CW Video if there was anything that they had done in the video that proved "not so good".  He said that he would never screw the muzzle cap through the stock and into the barrel again.  He said that it changed the point of impact from summer to winter. I thought that was very interesting.  Let's hear it for velcro I'm running out of Penrose Drain tubing.  Nice job on your project still love to see it in Bowling Green.   
         Hank

Offline Curtis

  • Hero Member
  • *****
  • Posts: 2321
  • Missouri
Re: Current project by Curtis - Christian's Spring rifle inspired by RCA #43
« Reply #80 on: November 17, 2016, 05:47:57 AM »
Hank, thanks for donating your 2 cents worth!  That is really good info to consider.  Makes me think I may go with what Singlemalt suggested and just make it look like the cap is screwed to the barrel.  I'll try to remember to bring you some of that Velcro at Bowling Green.

Paul, when are we going to get together and have that beer?


Curtis
« Last Edit: November 17, 2016, 08:39:56 AM by Curtis »
Curtis Allinson
~~~~~~~~~~~~~~~~~~~~~~~~~~~~~~~~~~~~~~~~~~~
Sometimes, late at night when I am alone in the inner sanctum of my workshop and no one else can see, I sand things using only my fingers for backing

Offline Curtis

  • Hero Member
  • *****
  • Posts: 2321
  • Missouri
Re: Current project by Curtis - Christian's Spring rifle inspired by RCA #43
« Reply #81 on: November 17, 2016, 06:40:06 AM »
Just a little tidbit here for those newer builders out there, maybe you will find it useful.  I overshot a bit when I did the countersink on one of my buttplate screws, so I used a rounded and flat punch to peen the brass and move some metal in the direction of the countersink.  I was able to make the problem all but disappear after filing up the plate.  This works with soft brass or mild steel, probably not with cast bronze or hard cast steel.  Here are some before and after pics:


Curtis
« Last Edit: January 30, 2020, 08:44:26 AM by Curtis »
Curtis Allinson
~~~~~~~~~~~~~~~~~~~~~~~~~~~~~~~~~~~~~~~~~~~
Sometimes, late at night when I am alone in the inner sanctum of my workshop and no one else can see, I sand things using only my fingers for backing

Offline Curtis

  • Hero Member
  • *****
  • Posts: 2321
  • Missouri
Re: Current project by Curtis - Christian's Spring rifle inspired by RCA #43
« Reply #82 on: November 17, 2016, 08:38:35 AM »
Hello again folks, I have been busy chasing Bambi and doing a little brush hoggin', but finally made it back in the shop for a spell.  It's time to put a patch box on the rifle.  I decided on a wooden box for the gun, and this will be a first for me since I have yet to do one.  So it could get interesting....

I will start with the lid, so I select a scrap piece leftover from my stock blank, draw the plan and profile for the lid and saw it out.


Then square it up some:


Next I made up a couple of special tools.  I got this Idea from Jack Brooks, who in turn got the idea from a former student if I remember the story correctly.  The tool is made from a 60o three cornered file.  Grind one side safe, then grind a chisel point on the end of the file with the safe edge on the bottom.  Take it slow and dunk it in water often to keep it cool and preserve the hardness of the file.  I got one of these too hot and had to re-harden and heat treat the tip. These will be used in making the dovetails on the lid and in the rifle box.

Chisel point:


Safe side:


I made up a third 60o chisel with all three sides ground safe, but neglected to get a picture.  I used a wet grinder for that one and didn't burn the tip.


....and in case I need to grind a really large one I have Big Brother.  ;D


Now I mark lines for the dovetail portion of the lid.


Then remove the wood in front of the lead dovetail.  I sawed down to my reference mark, the powered most of the wood off with a farrier's rasp.  I put a razor knife blade in the saw cut to act as a fence to keep from buggering my ledge.


Now to cut a recess for the side dovetails... Since I am not the best sawyer, I stamped a line with a chisel and back cut a groove to help keep my saw blade on track.  The lid tapers a bit from back to front, and the dovetails will taper slightly more than the lid.


I started to saw the edge as well, but after buggering one edge with the saw I used a chisel to cut down to my saw line.  I will have to fix the boo-boo later and will take pics when I do.


Next I refined my sketch of the nose in pencil, then rasped it to shape.  Then I check it for square - I often use a red or blue Sharpie to mark on the edge of my square, which in turn will transfer a mark to the high spots if you move the square laterally.


It's time to start cutting the dovetails.  I first marked a 60o reference on each end of the dovetail, then alternated between using the chisel and the file to cut the dovetails.  I proceeded carefully and was pleasantly surprised on how easily they were formed.  Use the sides of the file as a guide.  You have the tilt the back edge of the file up to make a chisel cut.  I recommend you put a razor edge on the chisel point like you would any other chisel.


I started cutting the dovetail on the other side, then decided to fix my hacked up saw job so I would have a flat edge to index my cuts with.  First I cut a small flat stick of wood from the same block that the lid came from, using wood from close the the area that I will be fixing.  Since I cut it with a hand saw, it was somewhat rough and thicker than what I wanted, so I put a razor in the vice and used it to scrape the stick thin and smooth.  Don't forget to take the upside-down razor out of the vice.  ;D  
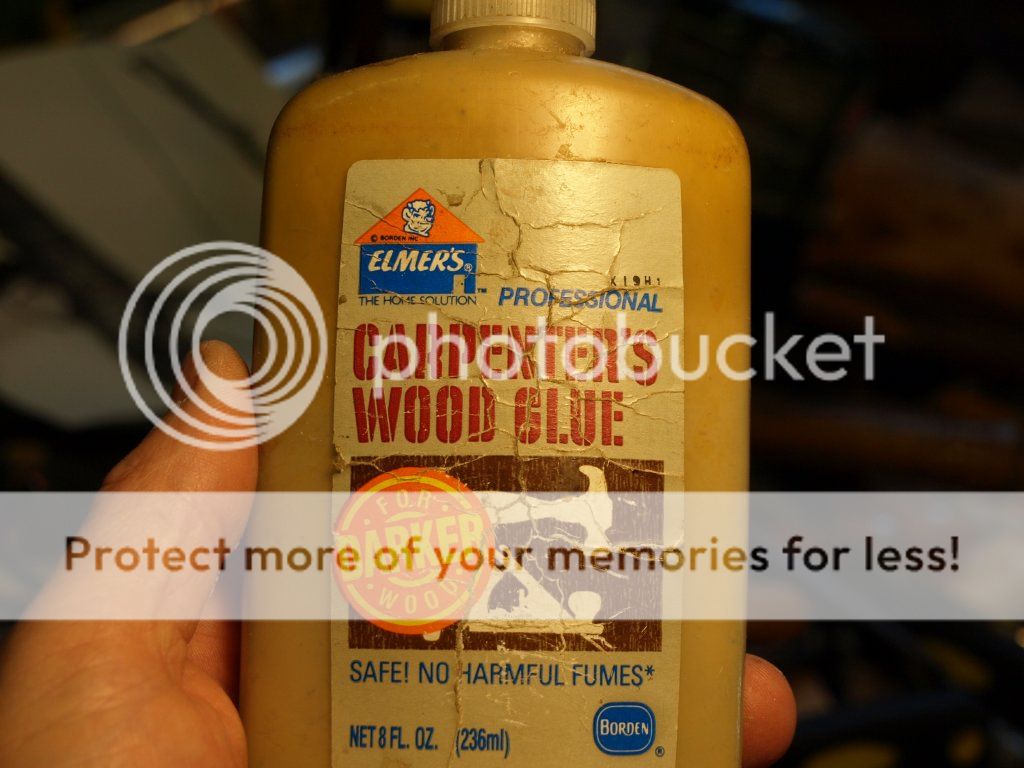
I beveled the bottom edge to fit into the partially finished dovetail.  After carefully matching the grain and curl, glue was applied the both pieces and it was clamped in a vice.


I really like this glue for maple and walnut.  I don't remember where I got it and haven't seen it in any of the big box stores, so when I get low I will have to search for it online.  It is very strong and won't leave a yellow line.  A tight joint will disappear after staining maple or oiling walnut.


After the glue is dried and wood filed flush on the side:


Now to trim back the patch and finish the dovetail.  Alternate cuts with the chisel between sides of the dovetail, and switch to filing when needed.  I switched from the coarse file to the finer file, or the triple safe edge chisel as needed.


The front dovetail was cut last.  It takes a sharp chisel for the end grain.  In retrospect, I think may cut this one first on the next lid I make.  I didn't have any issues, however I was worried the whole time I might chip out a big chunk and have another repair to make.


Dovetails complete!


Time to shape the lid up a bit.  I knocked the corners off with a scrub plane:


Then started contouring and shaping with a spoke shave.  The spoke shave makes very quick work of it!:


A little file work smoothed it all out.  I forgot to take a picture but there will be plenty that show the lid during the fitting process that will come later.

Now I start preparing a flat spot on the butt stock for the box and lid.  I use a straight edge marked up with a Sharpie to help show me the high spots:


I ran out of time for the day, so that's it for now!  Thanks for looking.

Curtis
« Last Edit: January 30, 2020, 08:48:14 PM by Curtis »
Curtis Allinson
~~~~~~~~~~~~~~~~~~~~~~~~~~~~~~~~~~~~~~~~~~~
Sometimes, late at night when I am alone in the inner sanctum of my workshop and no one else can see, I sand things using only my fingers for backing

Offline SingleMalt

  • Hero Member
  • *****
  • Posts: 613
  • One day I'll be considered a good builder.
Re: Current project by Curtis - Christian's Spring rifle inspired by RCA #43
« Reply #83 on: November 20, 2016, 08:51:46 PM »
Thanks for illustrating the fabrication of a one piece patch box lid and the "chisel files."  I've always done mine in two pieces, so this is something new to me that I want to try..
Never drink whisky that isn't old enough to vote.

"The penalty good men pay for indifference to public affairs is to be ruled by evil men."- Plato

"The Constitution shall never be construed to prevent the people of the United States who are peaceable citizens from keeping their own arms."

Offline oldtravler61

  • Hero Member
  • *****
  • Posts: 4398
  • We all make mistakes.
Re: Current project by Curtis - Christian's Spring rifle inspired by RCA #43
« Reply #84 on: November 20, 2016, 11:24:28 PM »
Curtis I want to thank you for what you are doing! Year's ago I purchased Herchels videos on gun building. What you are doing here has helped myself an many other's. I put what you are doing next to those!  Experience an amateur builders alike have bennifited from this. Thank you very much.  Mike

Offline hortonstn

  • Hero Member
  • *****
  • Posts: 650
Re: Current project by Curtis - Christian's Spring rifle inspired by RCA #43
« Reply #85 on: November 21, 2016, 02:51:35 AM »
hey Curtis
im usually always available for that beer id love to show you some of my lh flintlocks
ive built thanks to all the folks on this websight
paul
« Last Edit: November 21, 2016, 04:29:04 PM by hortonstn »

Offline Curtis

  • Hero Member
  • *****
  • Posts: 2321
  • Missouri
Re: Current project by Curtis - Christian's Spring rifle inspired by RCA #43
« Reply #86 on: November 21, 2016, 06:35:51 PM »
Thanks guys, I'm glad to hear you may be getting something useful out of this, it makes it worth the trouble of taking the photos and writing things up.  Don't forget I'm always up for questions, and will be glad to give answers if I have one.

Oldtraveler61,  I appreciate the comparison, but in no way am I near the same class of builder as Herschel House!  I'm just one guy stumbling through a build and sharing my journey.  

Paul, that would be fun!

With luck I will have the patchbox today completed and post pictures this evening.

Curtis
« Last Edit: November 21, 2016, 06:37:31 PM by Curtis »
Curtis Allinson
~~~~~~~~~~~~~~~~~~~~~~~~~~~~~~~~~~~~~~~~~~~
Sometimes, late at night when I am alone in the inner sanctum of my workshop and no one else can see, I sand things using only my fingers for backing

Offline Curtis

  • Hero Member
  • *****
  • Posts: 2321
  • Missouri
Re: Current project by Curtis - Christian's Spring rifle inspired by RCA #43
« Reply #87 on: November 22, 2016, 08:50:33 AM »
I had too many chores to do today to get my patchbox completely finished, however I did make some progress.  All work and no play makes Curt a dull boy... Here are some photos of what I have and how I got there.

After getting a flat spot started by scraping, I moved on to rasps and files in order to remove wood quicker, I even did some draw filing.


After prepping the area, I laid out the center-line of the lid, starting from a little higher than midpoint on the butt on the back to the touch hole on the other end.  I then traced around the outside of the lid, then the dovetailed portion of the base.  I then measured to the minor dimension of the dovetails and put those lines on the stock.  The latter (inside) lines will be my cut lines for removing wood to allow for creating the dovetails on the stock. I scribed my cut lines so I can feel where the chisel belongs for the cut.


The excavation begins, using whatever means necessary.  I used a depth gauge to measure progress:


Excavation completed!


I cut the side dovetails, alternating between chiseling and filing with the special three cornered chisel-files.


Then start fitting the lid.  I used a little letting black on the lid to spot trouble areas to remove wood from.


Once the lid was contacted the front of the excavated area, I cut the dovetail for that area.  For starters I used my triple safe edge chisel-file for a guide.


I used a mortising chisel as well as a couple of skew chisels to clean out the corners.


The first round of fitting is now complete.


The buttplate was reinstalled, filed to reflect the new flat spot, then marked for the dovetail cutout.


The marked piece was removed from the plate with a hacksaw and a jeweler's saw, the plate installed again, then finish filed to match the wood dovetails.  Both unaltered three cornered files and the special chisel files were used.


The lid is test fit until it works nicely:


Then filed flush with the buttplate.


The back of the lid was traced onto .080 brass and cut out with a hacksaw, leaving some extra material around the lines to allow for the brass piece to be angled when installed, and for fitting with files.


Check the fit, then carefully align and attach with wood screws.


The endcap was then filed flush with the wood, leaving a bit extra on the dovetails for final fitting.


When happy with the cap, I then countersunk the screw heads, leaving the slots proud of the brass so they can be filed off, leaving enough countersunk screw head in the brass to retain the cap.


I then filed wood off the front dovetail of the lid, about 3/4 the thickness of the endcap, then fine tuned the brass cap by filing until it fits the dovetail in the buttplate nicely.  Remove a bit more from the front dovetail if needed to bring the brass endcap in line with the inside face of the butplate.  When I was getting really close to where I wanted it, I cut a piece of carbon paper to fit in the mortice and tapped the lid forward for a tight fit on the front mortise dovetail.  I used a chisel to pare off wood inside the mortise as needed.  Be sure to hang onto the small bit of carbon paper when you blow out the wood chips or you will may end up cutting another one.  Don't ask me how I know that.   ::)


When satisfied with the fit on both ends, the fitting is done and the final filing begins.


I am now finally finished with the lid until I make the retaining spring.

I started boring out the box cavity before I had to quit for the day.  I used an old brace I picked up in Iowa at an antique show a couple of years back, complete with a variety of bits for all manner of drilling operations.  It's a dandy!


Then I ran out of time, with luck I may get back to it for a while in the midst of Thanksgiving activities.  I'll post some progress when I can!

Thanks again for looking,
Curtis
« Last Edit: January 30, 2020, 09:11:15 PM by Curtis »
Curtis Allinson
~~~~~~~~~~~~~~~~~~~~~~~~~~~~~~~~~~~~~~~~~~~
Sometimes, late at night when I am alone in the inner sanctum of my workshop and no one else can see, I sand things using only my fingers for backing

Offline Curtis

  • Hero Member
  • *****
  • Posts: 2321
  • Missouri
Re: Current project by Curtis - Christian's Spring rifle inspired by RCA #43
« Reply #88 on: November 29, 2016, 06:44:00 AM »
Five holes were bored into the patch box cavity.  I was quite surprised by the old bits, once I figured out how to sharpen them correctly, they cleanly bored a hole almost as quickly as a modern Forstner bit.


Excess wood around the perimeter of the cavity was removed as quickly and neatly as I could with chisels.


Then the bottom of the box was cleaned up with chisels, an old woman's tooth, and by scraping.


And that's it for the patch box cavity excavation.  I am considering leaving some of the tool marks on the floor of the cavity so future longrifle enthusiasts will have something to converse about.   ;D


Curtis


« Last Edit: January 30, 2020, 09:21:24 PM by Curtis »
Curtis Allinson
~~~~~~~~~~~~~~~~~~~~~~~~~~~~~~~~~~~~~~~~~~~
Sometimes, late at night when I am alone in the inner sanctum of my workshop and no one else can see, I sand things using only my fingers for backing

Offline Curtis

  • Hero Member
  • *****
  • Posts: 2321
  • Missouri
Re: Current project by Curtis - Christian's Spring rifle inspired by RCA #43
« Reply #89 on: November 29, 2016, 08:03:12 AM »
The next step will be manufacturing a spring for the patchbox lid.  I started making one from an old buggy spring, but ran into issues when forging out the head as the metal was too brittle.  Perhaps I didn't get it annealed properly?  So I chose another scrap that appeared to be springy....

Cutting spring blank with a hacksaw:


Forging out the head, it must be angled horizontally and vertically to match the shape of the back of the lid:


Once forged out a bit oversize, the head was marked up and filed to shape, then the blank was cleaned up a bit.


The plan and profile was sketched on the blank, then the blank was filed to the final contour.


Though part of the host piece of steel had once been bent in an arc and used like a spring, the much smaller spring I had fashioned would not reliably hold it's curved shape and act like a proper spring.  I attempted to harden it, but alas the carbon content was insufficient.

Instead of giving up on it, I decided to test a theory:  Since this is a medium sized, light duty spring, if I would case-harden the springy portion, why wouldn't it hold up to the job and make a decent spring?  So I bent the spring to the desired profile and case hardened the lower two thirds.  It is now quite springy, and retained its shape even when closed several times in a vice.  Don't think it will hold up?  Then it is up to you, the reader to prove my theory wrong! :o  Naturally, if it shows signs of failing I will tell on myself and report it here as well.  8)


The partially complete spring must now be inlet into the lid, so it was positioned an scribed around.  I will cut the mortise a bit larger than the spring to allow for free movement.  I laid out the mortise approximately a quarter inch shorter than the spring body, and flat on the end so the spring can be burned and driven into the lid when it's time.


Wood is then removed:


Once the mortise is near depth, I cut the brass plate to clear the spring, using a jeweler's saw:


Then file it to final depth.  I will adjust the mortise and file more as needed:


The catch it then marked on the spring, the line cut with a jeweler's saw, and filed into it with a safe edged mill file.


In a recent discussion about patch boxes, I was told by Bob Lienemann that "sometimes there is a metal shim about ¼” or so forward of rear, and a <corresponding> notch in the patch box spring, so that box can be slid back a bit, without fully removing it."  This feature is possibly just on finer rifles.  One theory is so the patchbox lid could be slid back in wet weather to prevent it sticking when it swelled.  Or could it be a safety catch so the lid is not lost if the catch spring is bumped in the field?

Regardless that the proper reason could possibly be lost to antiquity, I decided I would see if I could make a secondary catch for this patchbox lid.

A small piece of steel stock was cut, profiled and sharpened so it could be driven into the floor of the patchbox cavity.  I made sure it was fit tightly against the back wall:


When I was satisfied with the fit and function, the remaining third of the spring faced was case hardened and installed in the lid.


Box closed:


Then opened to the notch:


I don't know about anybody else, but I personally think it's time for a beer!

Thanks for looking,
Curtis
« Last Edit: January 30, 2020, 09:43:27 PM by Curtis »
Curtis Allinson
~~~~~~~~~~~~~~~~~~~~~~~~~~~~~~~~~~~~~~~~~~~
Sometimes, late at night when I am alone in the inner sanctum of my workshop and no one else can see, I sand things using only my fingers for backing

Offline conquerordie

  • Hero Member
  • *****
  • Posts: 528
Re: Current project by Curtis - Christian's Spring rifle inspired by RCA #43
« Reply #90 on: November 29, 2016, 03:52:43 PM »
So far on my next build I need to try scraping my brass components and drawing the sideplate on the stock first, and then tracing it as a pattern. That seems so simple, and I've never thought to do it. Loving his thread.
Greg
« Last Edit: November 29, 2016, 03:53:38 PM by conquerordie »

Offline RickH

  • Starting Member
  • *
  • Posts: 31
Re: Current project by Curtis - Christian's Spring rifle inspired by RCA #43
« Reply #91 on: November 29, 2016, 05:17:59 PM »
Great Tutorial!
Thanks for taking the time to show your steps in building this rifle!  It really helps new guys, like myself!!

Offline oldtravler61

  • Hero Member
  • *****
  • Posts: 4398
  • We all make mistakes.
Re: Current project by Curtis - Christian's Spring rifle inspired by RCA #43
« Reply #92 on: November 30, 2016, 02:57:53 AM »
This thread should imo be put in the tutorial section. There is such a good amount of information. Enjoying this a lot, thanks Curtis

Offline Dphariss

  • Hero Member
  • *****
  • Posts: 9879
  • Kill a Commie for your Mommy
Re: Current project by Curtis - Christian's Spring rifle inspired by RCA #43
« Reply #93 on: December 07, 2016, 05:18:42 PM »
Great tutorial and work. Thanks

Dan
He who dares not offend cannot be honest. Thomas Paine

Offline David Rase

  • Hero Member
  • *****
  • Posts: 4309
  • If we need it here, make it here. Charlie Daniels
Re: Current project by Curtis - Christian's Spring rifle inspired by RCA #43
« Reply #94 on: December 07, 2016, 08:45:44 PM »
Curtis,
Glad you are doing a tutorial and I am just posting progress updates.  My hat is off to you for posting all the pictures.  It is a lot of work to take the photos, upload them to Photobucke ot Tinypics and then download them to ALR.  I have been having issues with Photobucket the last 2 times I tried to upload photos.  Opened an account in Tinypics which works but seems to take more time.  Maybe I just need to get more familiar with the host.  What host are you using 
I look forward to your continued documentation of your processes.  I always learn something.
David

Offline D. Taylor Sapergia

  • Member 3
  • Hero Member
  • *
  • Posts: 12634
Re: Current project by Curtis - Christian's Spring rifle inspired by RCA #43
« Reply #95 on: December 07, 2016, 09:33:37 PM »
I'm with you David.  I really enjoy seeing how others go about these processes, and I too always learn something, and get stimulation and insight.
D. Taylor Sapergia
www.sapergia.blogspot.com

Art is not an object.  It is the excitement inspired by the object.

Offline Curtis

  • Hero Member
  • *****
  • Posts: 2321
  • Missouri
Re: Current project by Curtis - Christian's Spring rifle inspired by RCA #43
« Reply #96 on: December 08, 2016, 07:55:26 AM »
I really appreciate the encouraging words guys!  Dave, I have to agree with you, sometimes it can be a pain editing, uploading and posting all the photos... but it's still "fun to share" what happens in the shop and worth it in the long run.

There has been some family obligations and holiday stuff slowing me down, but hopefully I will have things wrapped up for another posting in a couple of days.  I have been sculpting and polishing my lock - is it just me or does lock polishing seem to take forever to anyone else?   ::)

Curtis
Curtis Allinson
~~~~~~~~~~~~~~~~~~~~~~~~~~~~~~~~~~~~~~~~~~~
Sometimes, late at night when I am alone in the inner sanctum of my workshop and no one else can see, I sand things using only my fingers for backing

Offline Chowmi

  • Hero Member
  • *****
  • Posts: 843
Re: Current project by Curtis - Christian's Spring rifle inspired by RCA #43
« Reply #97 on: December 08, 2016, 10:16:43 AM »
I have been sculpting and polishing my lock - is it just me or does lock polishing seem to take forever to anyone else?   ::)

Curtis

Yes it does!  It not just you! 

I'm doing the same now and it is going sllooowww... 


Cheers,
Norm
Cheers,
Chowmi

NMLRA
CLA

Offline Curtis

  • Hero Member
  • *****
  • Posts: 2321
  • Missouri
Re: Current project by Curtis - Christian's Spring rifle inspired by RCA #43
« Reply #98 on: December 10, 2016, 07:02:35 AM »
Back again, for what it's worth!  As I mentioned earlier, I have been working on sculpting the cock and lock plate to look more like the original lock on #43, also cleaning up and polishing the lock in general.

Just for a visual reminder, here is a photo of the lock before sculpting next to a photo of the original:


I have an old Ottoman flintlock pistol that happens to have a very interesting forged lock that was sculpted in a very similar manner to what I am aiming to achieve with my lock, here are a couple of photos that illustrate in better detail than the photo of #43's lock.


First I attack the cock with a square graver, after marking a cut line with a blue Sharpie.  The graver should be positioned to give a flat face at the back of the cut.


 After making a few passes and achieving the depth of cut I wanted, the filing begins to clean up the bevel.  Several different files were used.  The cock topjaw was polished and teeth cut in the "mouth".


Once I was finished with the cock, I moved on to the lock plate.  Again, multiple passes were required to reach the desired depth.  I simply used the edge of the bevel to establish my cut line on the plate.


I found I could use the sharp face of the graver as a scraper, pushing it to cut the facet a bit cleaner before filing the bevel.


Onto the cleanup filing....  use whatever fits the need, be careful to not scar the flat face at the edge of the plate.  A safe edge helps a great deal.


When that chore was complete, I moved on to polishing the plate.


If you are not on speaking terms with your Dremel (like Chowmi  :) ) a diamond file works pretty well on the hardened frizzen.  I started with a coarse grit and migrated to finer grits.  Diamond sharpening plates will also work and can be purchased fairly inexpensively.


The cast frizzen spring required considerable cleanup and re-cutting some if the details and slashes.

]

Once all the polishing and detailing was completed, the lock was assembled and checked for appearance.  I will continue lo look it over as I progress with the rifle and see if I think something needs to be refined or altered.  Here are some photos with it back in the rifle:


That's it for tonight!  Thanks for taking a look.

Curtis
« Last Edit: January 30, 2020, 09:58:18 PM by Curtis »
Curtis Allinson
~~~~~~~~~~~~~~~~~~~~~~~~~~~~~~~~~~~~~~~~~~~
Sometimes, late at night when I am alone in the inner sanctum of my workshop and no one else can see, I sand things using only my fingers for backing

Offline Chowmi

  • Hero Member
  • *****
  • Posts: 843
Re: Current project by Curtis - Christian's Spring rifle inspired by RCA #43
« Reply #99 on: December 10, 2016, 08:08:29 AM »
Hey Curtis,
That looks great! I've been dreading doing the same with mine, but that's a ways in the future.  Gotta finish other projects first.
Thanks for posting your process, I had been thinking to use a flat graver, but I like your method better. A bit less metal removed on each pass perhaps than a flat one, but I would think more forgiving of slips.

Still not on speaking terms with the Dremel!! 

Where did you get the diamond file? I really like that idea. I have some diamond sharpening stones for my gravers but had thought to keep them for gravers only.

Cheers,
Chowmi. (Norm)
Cheers,
Chowmi

NMLRA
CLA