Author Topic: Making a gunlock  (Read 117469 times)

Offline James Wilson Everett

  • Hero Member
  • *****
  • Posts: 1091
Re: Making a gunlock
« Reply #100 on: May 11, 2016, 02:47:11 PM »
Guys,

Now that I am back in the US, it is time to do a little more work.  Finishing the top jaw, the difficult thing is how to hold the part for the final filing.  I just use a wood screw and fasten the jaw to a piece of wood. 


The upper and lower flat surfaces of the top jaw are not parallel.  The jaw thickness is a bit less at the heel where is contacts the cock post.  When you tighten the top jaw screw this tends to force the tip more tightly onto the flint.  Looking at the photos I think that you can see this.  Sometimes the screw hole in the jaw must be adjusted or elongated a little bit to allow for this action.  This is very slight, but important.  This is why the hole in the top photo is a bit out of round.


Next time - I repent of using a store-bought frizzen earlier.  We will see one way of forging this difficult part!

Jim
« Last Edit: November 28, 2019, 05:20:15 PM by James Wilson Everett »

Offline D. Taylor Sapergia

  • Member 3
  • Hero Member
  • *
  • Posts: 12549
Re: Making a gunlock
« Reply #101 on: May 11, 2016, 06:57:00 PM »
James:  I have an old worn out sharpening steel - used on chef's knives.  It's taper and fine lengthwise ridges hold the top jaw for filing.  I just tap it into the bottom surface until it's tight and clamp the steel into the vise.  For engraving, set the jaw into Bondo on a piece of wood you can clamp in your vise.
D. Taylor Sapergia
www.sapergia.blogspot.com

Art is not an object.  It is the excitement inspired by the object.

Offline James Wilson Everett

  • Hero Member
  • *****
  • Posts: 1091
Re: Making a gunlock
« Reply #102 on: May 13, 2016, 04:06:34 PM »
Guys,

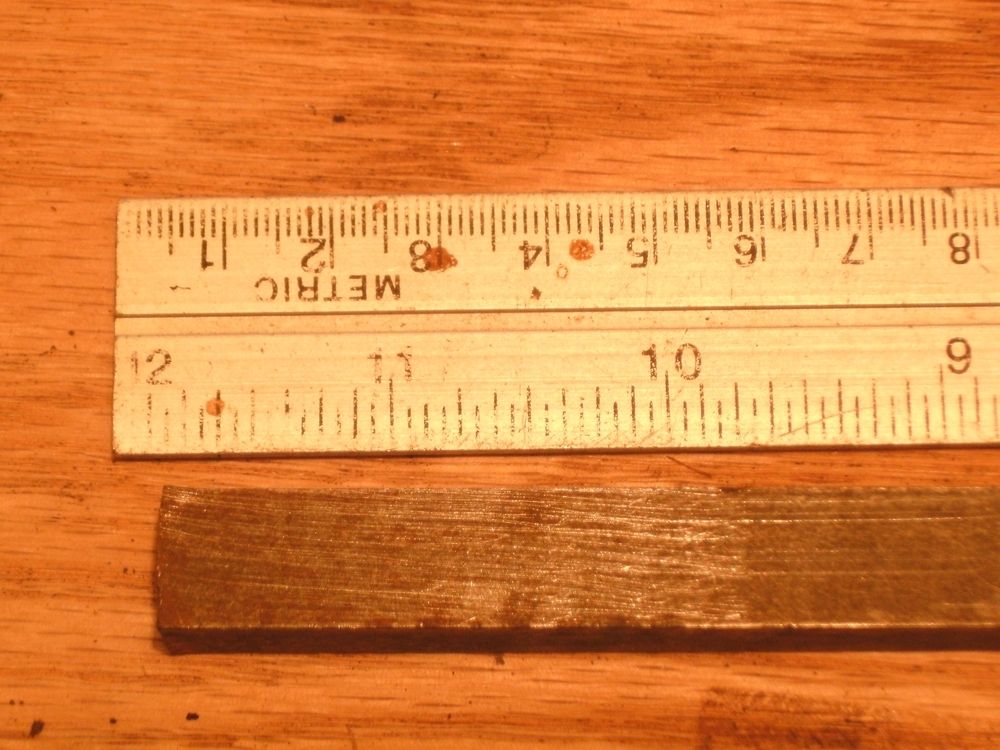
Now for a difficult part, the frizzen.  Earlier in this topic I used a store-bought frizzen, not a good way to show how to really make a gunlock.  My apology for being lazy.  I find the hammer or cock a really fun part to make.  Not so with the frizzen.  Anyway, here we go.  I start with a square bar of W1 tool steel, nearly the same as 1095 steel, fully hardenable water quench steel.  Use 9/16 or 5/8 inch square bar.


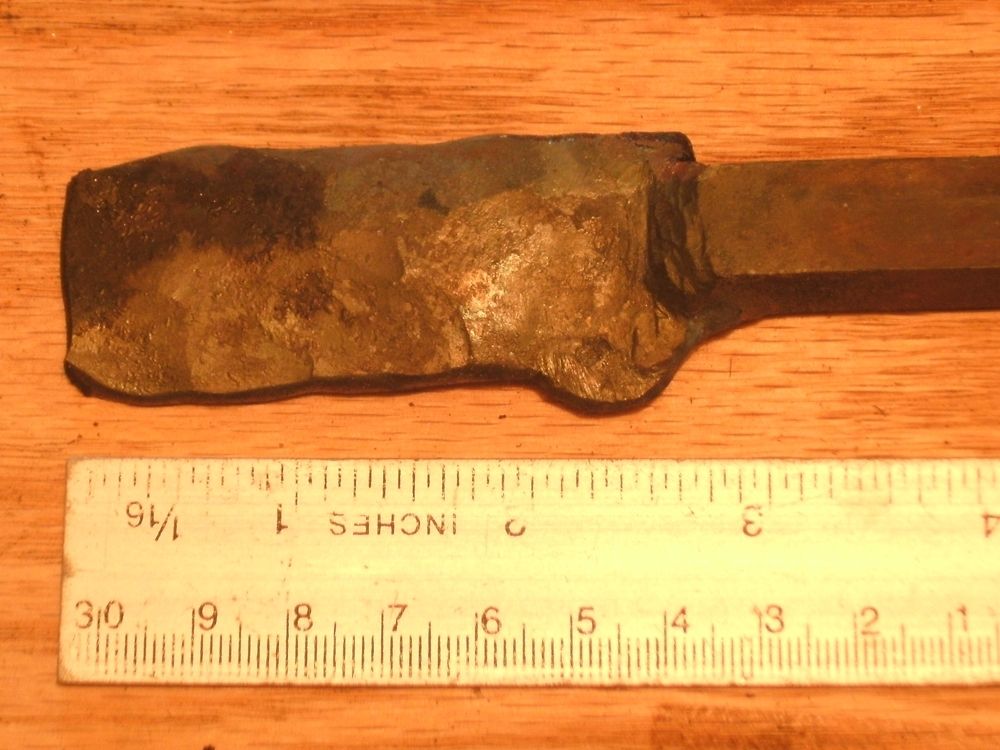
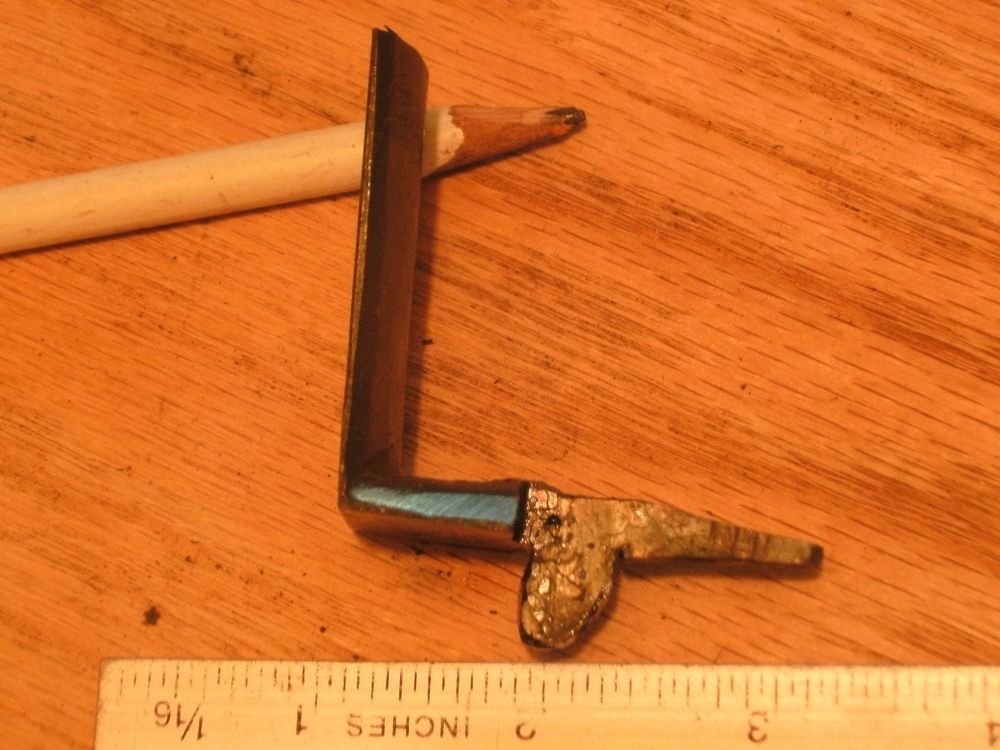
Forge a blade that is the width and length needed for the frizzen.  Leave a sharp transition back to square.  The remaining square part will eventually be the frizzen section that has the pivot hole/cam/stop.  If you try to make a frizzen from a piece of flat stock, it is much more difficult to "bump-up" the section here to a larger thickness. When forging it is a lot easier to make a thick part thinner than it is to make a thin part thicker.  Here you can see I forged a small bump that will be the part of the frizzen pan cover away from the flash hole side.


Next, make the bend at the transition of the frizzen from the pan cover to the blade.  You must work a lot on this bend to get the outside corner really square and sharp.  This takes me at least a dozen heats to change the bend from a gentle curve to a sharp corner.  You really should not try to short cut this step.


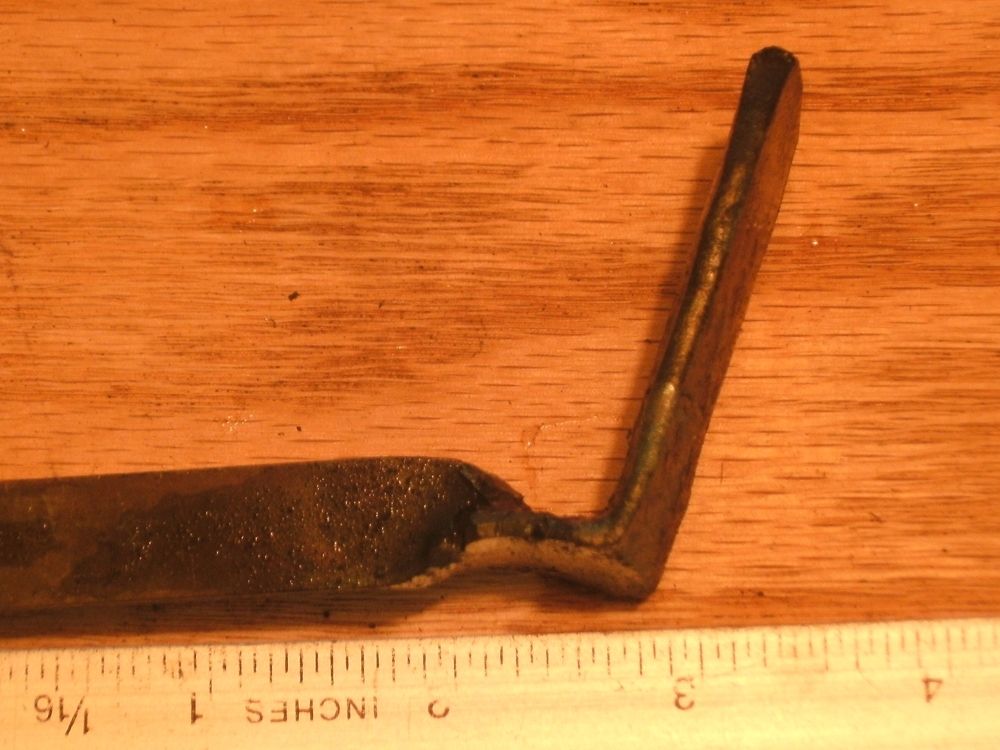
Next, bend the remaining square section down for the hole/cam/stop area.  Cut the rough frizzen from the bar leaving plenty of material for this section, don't cut it too short.


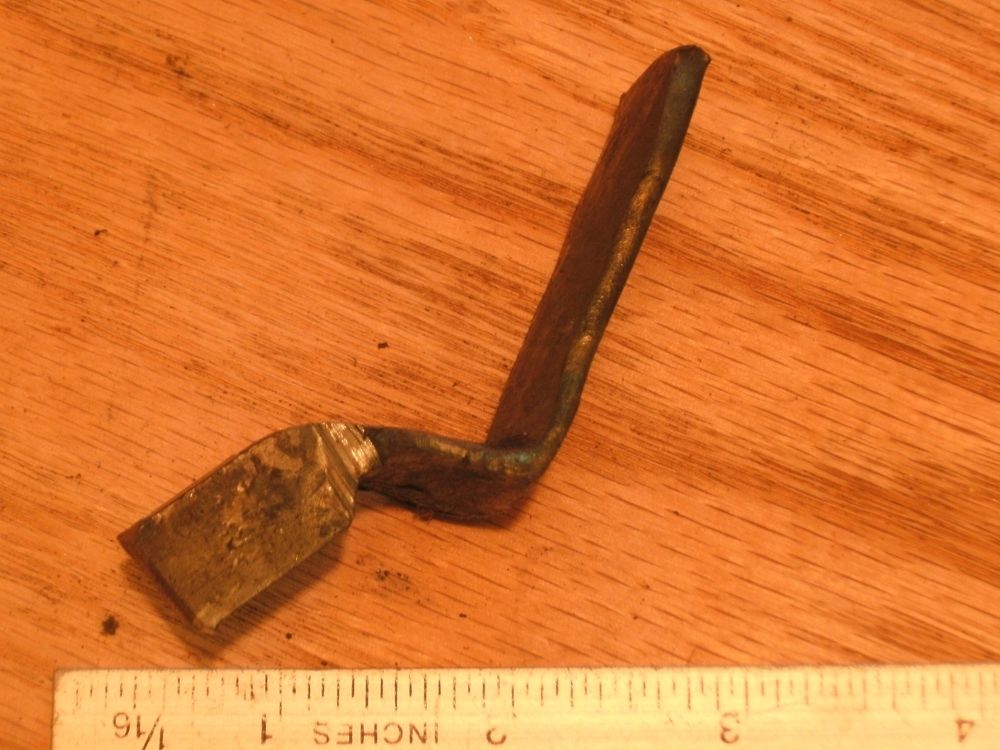
Next, split the square section with a hack saw and spread the two leaves apart.  Just as with the hammer, you may need to use the dull cold chisel tool to close up any tear at the tip of the split as you open the two leaves.  Rough forge and file until the frizzen looks like this.  As you can see, I have smoothed the pan cover and blade sections a lot.


At this point, file the sharp outside square, the pan cover bottom and the side of the hole/cam/stop to very nearly the finished dimension.  Don't worry that the part is rather ugly now, here is where you set the final dimensions for the frizzen to function properly.  Now glue the rough frizzen to the top of the flash pan using super glue as before with the store-bought one.  This allows the pivot hole to be drilled as to maintain proper alignment, I know that this is "cheating" for the HC folks.


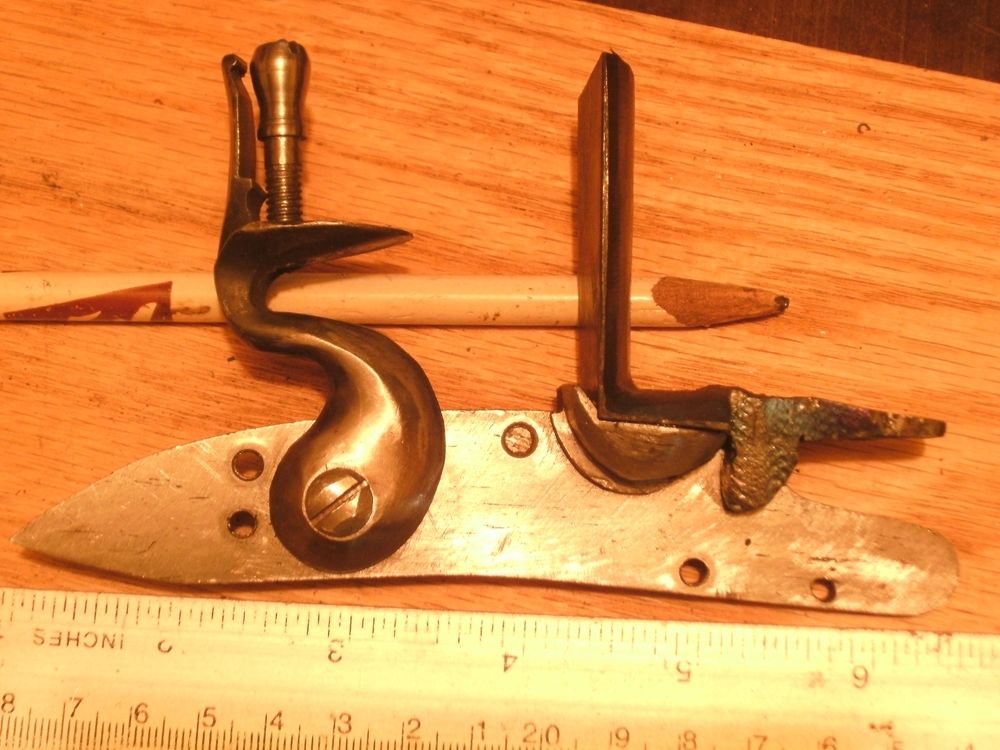
Drill the hole for the pivot screw.  I did use a drill press and a twist drill here, the crowd was not watching.  Give the frizzen a rap with a hammer and the super glue joint will release.  Finish enlarging the pivot hle to the proper diameter for the pivot screw shank.  The drill should follow the existing hole. 


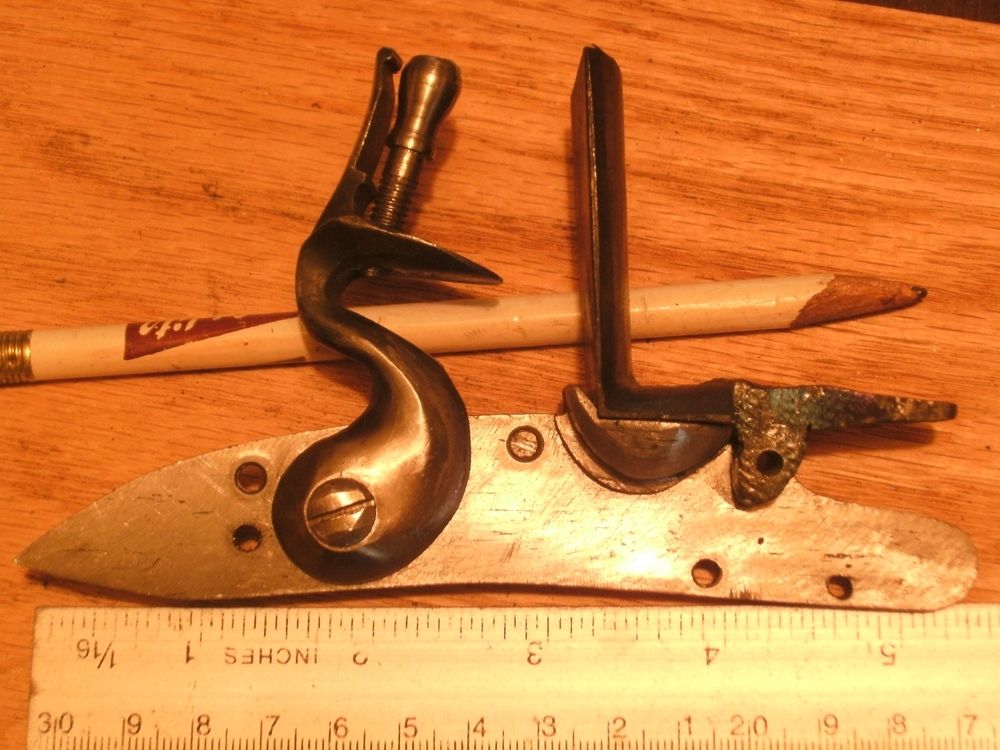
Now we begin filing the part to bring it to the shape and style we want.  Here I want a rounded shape to match the eventual rounded shape of the lock plate.  You could just as easily file the part to an angled shape with flats.


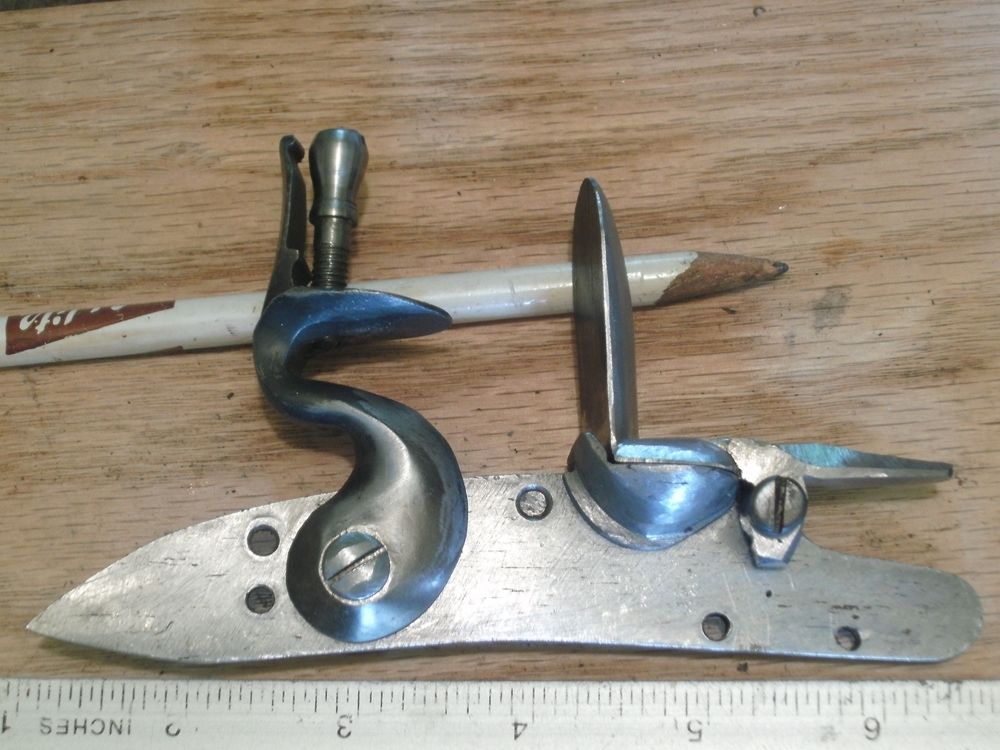
Lastly we bend the blade to a proper curve and bend the stop to an attractive curve and make the whole thing "Pretty"  But that for later.

Jim
« Last Edit: November 28, 2019, 05:26:08 PM by James Wilson Everett »

Offline David R. Pennington

  • Hero Member
  • *****
  • Posts: 2886
Re: Making a gunlock
« Reply #103 on: May 13, 2016, 04:24:15 PM »
Wouldn't it be a lot easier to buy a Chambers lock?

It would also be a lot easier to go buy an inline at Walmart.  ;)

I love this thread. It is like an online college course for flintlock riflesmiths. It would be easier...... I don't do any of this for easy. I want to learn. If I ever intend to consider myself a gunsmith I need to be able to build a complete rifle from scratch. That is my goal and I hope I live long enough to accomplish it! I have made all the internal parts for a lock individually but not a complete lock yet. Started on a forge welded barrel but not finished yet. Plan to work on that project again next week end. Hope to get the whole thing welded and start building the drilling bench.
My hat is off to the amazing craftsman who can take a set of parts and produce a real work of art like some of the gorgeous pieces we see here. I don't think any of my guns will ever reach that level of art but I am fascinated with the process and want to learn all I can about it.
Thanks again James!
VITA BREVIS- ARS LONGA

Offline David R. Pennington

  • Hero Member
  • *****
  • Posts: 2886
Re: Making a gunlock
« Reply #104 on: May 16, 2016, 03:11:43 PM »
Jim, do you bend a radius in the frizzen face? I am anxiou to try a whole lock. We have another barrel welding session scheduled for this Friday and Saturday and if we ever get a good barrel welded up that rifle will need a scratch built lock.
VITA BREVIS- ARS LONGA

Offline James Wilson Everett

  • Hero Member
  • *****
  • Posts: 1091
Re: Making a gunlock
« Reply #105 on: May 18, 2016, 01:45:43 PM »
David,

Yes, the frizzen blade will be bent to a curve, the stop will be bent to that artistic curl, and the whole thing made "pretty".  This is where it is a good idea to have on hand an example of what a "pretty" frizzen should look like.  Sometimes my stuff looks rather clunky.  I am more of a mechanic than an artist.  When I get my round tuit, the frizzen will be finished!

Jim

Offline James Wilson Everett

  • Hero Member
  • *****
  • Posts: 1091
Re: Making a gunlock
« Reply #106 on: July 26, 2016, 05:09:46 PM »
Guys,

I forgot to include this little photo of the simple jig to hold the cock top jaw for the final shaping with the file.  Just a simple block of scrap wood to hold in the vise with a wood screw to hold the top jaw in place.  As you can see in the photo one side of the top jaw still needs to be shaped.  The flat surface on the upper side of the top jaw should not be much larger than the flange or rim of the top jaw screw.  I tend to shape the remainder of the top jaw as a straight line or bevel to the edge, not as a concave or other shape.  There is really not a lot of metal left when the top jaw is finished.

Jim

« Last Edit: November 28, 2019, 05:27:29 PM by James Wilson Everett »

hammer

  • Guest
Re: Making a gunlock
« Reply #107 on: August 07, 2016, 09:52:52 AM »
Compulsive viewing.  Just fascinating.    A question on the hand made (or bought-in) frizzen if I may.    Do you have a method for matching the curve on the face to the arc of rotation of the flint edge?     Is that something you determine in your design and layput before you start the construction?

BartSr

  • Guest
Re: Making a gunlock
« Reply #108 on: August 07, 2016, 09:55:38 PM »
Compulsive viewing.  Just fascinating.    A question on the hand made (or bought-in) frizzen if I may.    Do you have a method for matching the curve on the face to the arc of rotation of the flint edge?     Is that something you determine in your design and layput before you start the construction?
Me too, I want to learn more.

Thanks!

BartSr

Offline Justin Urbantas

  • Hero Member
  • *****
  • Posts: 1331
Re: Making a gunlock
« Reply #109 on: October 23, 2017, 09:15:37 PM »
Is there any more progress on the lock? I have loved seeing the process, and learned so much
thank you

Offline Bigmon

  • Hero Member
  • *****
  • Posts: 1294
Re: Making a gunlock
« Reply #110 on: October 23, 2017, 10:00:33 PM »
Your skill is just amazing to me.
Not to mention the patience required while doing all that file work.

I just can't understand how you can file that plate down and have it all a uniform thickness??
Just dont think I could ever do that.
Seems like a job for a milling machine, and then I still dont think I could do it.
Amazing

JVavrek

  • Guest
Re: Making a gunlock
« Reply #111 on: January 26, 2018, 06:19:05 AM »
Wow, Just Wow!!! Thank you for sharing this. Where abouts in Western Pa? I'm about 50 mile south of Pittsburgh and About 20 miles from Morgantown WV.
« Last Edit: January 26, 2018, 06:45:33 AM by JVavrek »

Bob USMC

  • Guest
Re: Making a gunlock
« Reply #112 on: August 23, 2019, 09:04:43 PM »
I read all of he original posts on how to make the flintlock lock with wrought iron, but have some questions regarding temper and heat treating.  I was able to find some very good quality wrought iron that is 100 plus years old and want to try my hand at creating a fully functional lock.  Once all the parts have been cut out and filed and appear to be correct, which parts need to be hardened or tempered?  Hopefully someone can provide that detail.  Thanks,  Bob

Offline G_T

  • Full Member
  • ***
  • Posts: 228
Re: Making a gunlock
« Reply #113 on: August 23, 2019, 10:58:57 PM »
As an absolute minimum, the tumbler, the sear, and the frizzen need to be hardened and tempered appropriately, or case hardened appropriately. The frizzen can be through hardened if it is steel, or case hardened if it is iron.

Any fly and any stirrup need to be hardened/tempered as well.

Springs of course need to be hardened and tempered, though you might get away with the sear spring not being so as the travel is small.

It is useful if the lock plate and bridle are hardened as well, so they don't wear fast. Case hardening would certainly be good for these parts. I understand to beware of lock plate warpage. I've not hardened a lock plate so have no experience doing so with that part. I've done all the rest, through hardening not case. Steel, not iron.

Gerald

Offline David R. Pennington

  • Hero Member
  • *****
  • Posts: 2886
Re: Making a gunlock
« Reply #114 on: August 25, 2019, 10:27:23 PM »
Likely most originals were almost all wrought iron with the working parts (tumbler, sear etc.,) case hardened. The frizzen could be iron and deeply case hardened or laminated with steel face. The springs of course would have to be steel.
VITA BREVIS- ARS LONGA