Thanks for the nice comments. As to the hearts; First I rounded the butt of the horn then I cut the hearts shapes out completely thru the horn and turned a base plug that fit up past the hearts a little. (The rest of the horn had been worked by now. Also this was a fairly thick horn)
Then with the plug installed in the very center of each cut out I put a very small screw with the top lower than the opening but with the head just above the surface of the plug, the screw is the anchor for the pewter. In a couple of the cut outs there were small voids where the horn met the wood, I used modeling clay to fill them, the kind that hardens in the oven works fine. I then poured the hearts one at a time, DO Not over heat the pewter or it will scorch/burn the horn. I shoot for just after it melts and swirls around nicely in the ladle. I use a bent serving spoon. They will fill up FAST. Then just filed them flush with the horn and they were done.
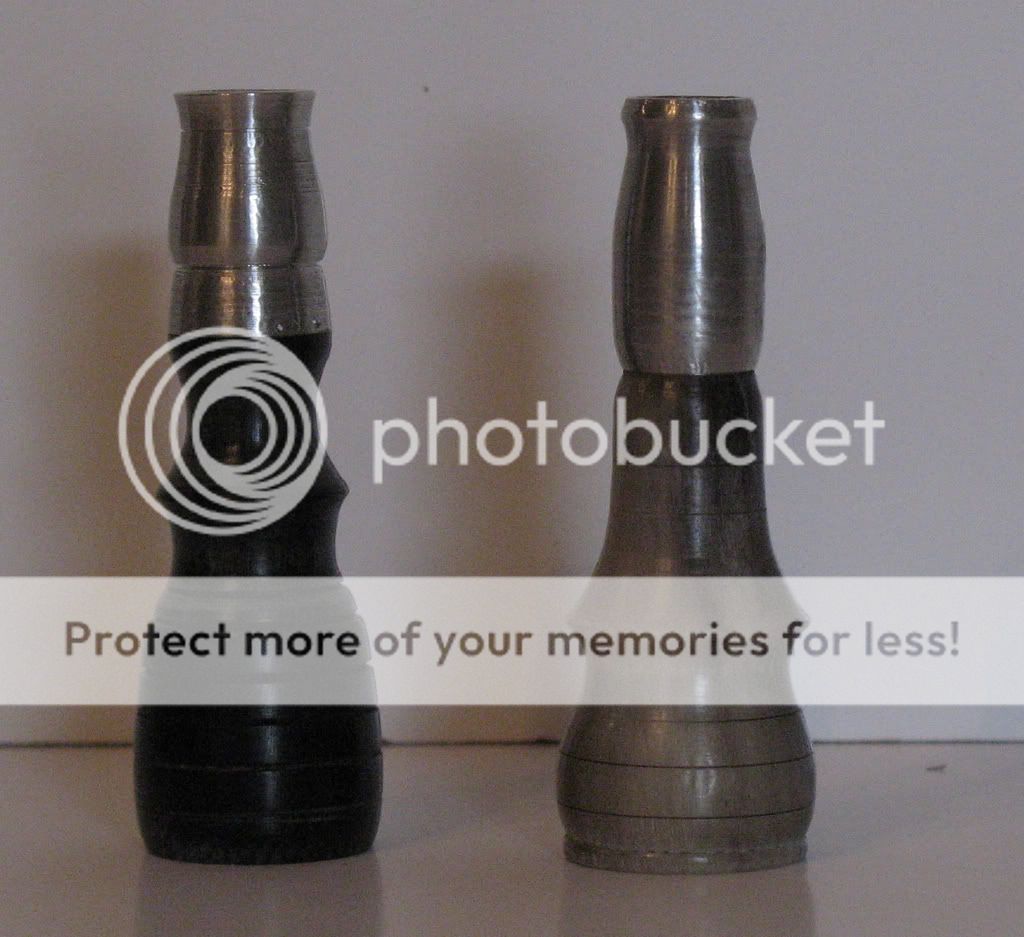
On the tip;(I drill a 1/4" hole in the tips and mount them on a pen turning mandrel to work them.) I turned the horn to a rough cone shape with a step at the point where I wanted the pewter to stop.Then cut a few bands around the portion that will be covered with pewter to help hold it on. On opposite sides of the tip close to the step file a deeper grove with a small fine half round file with the flat side toward the tip, these will keep the tip from turning. I then made a dam around the tip with a piece of folder that came down about a 1/4" below the step and taped it up tightly,masking tape will do. (I find that if you insert three or four small sticks between the paper and the horn it will help keep the thickness of the pewter even all around while you tape. Of course remove the sticks before pouring) I make the dam taller than the tip by about 1/2", this give you room enough to trim the tip and still have pewter showing.
Then insert a tight fitting piece of dowel or round wood that will fit the pouring hole in the tip, push it all the way thru the tip and leave some sticking out the top. You are now ready to pour, Once again-DO NOT over heat the pewter, see above. Pour it smoothly until it reaches the top of the dam, this will happen faster than you think. Let it set up and cool off, the wooden plug will slip out, might need a little help but it will.
Remove the piece of folder that was the dam, put the tip back on the lathe and turn it to whatever profile you are looking for. Be careful that you do not turn thru the pewter, keep on mind the thickness between the dam and the horn.
You can put bands anywhere you want on a tip or a horn for that matter. File/cut them in and made a dam that goes all the way around the horn, and make a spout on the dam to pour thru the spout is a little more work but it is doable.
Wow this kind of got away from me, it was the shortest route to answering the two questions. This is the way I do it, I'm sure there are other ways.
Tim C.
Notes:
1>I would suggest a practice pour to get used to the pewter temp and the working time. You can reuse the pewter
2>You can actually lengthen a tip quite a bit.
3>Be sure the area below where you are pouring is clear, there will be overflow, unless you are very steady.
4>You can used wood turning tools on the pewter.
5>Need I say: Safety, Gloves, eye protection and shoes.


