Author Topic: Pouring a pewter nose cap  (Read 57188 times)

Offline Ken G

  • Hero Member
  • *****
  • Posts: 5526
  • F & AM #758
Pouring a pewter nose cap
« on: May 05, 2009, 03:20:02 AM »
With all these Southern guns being built right now I figured a few pics of pouring a pewter nose cap might come in handy.  I hope someone finds this helpful.   
Ken

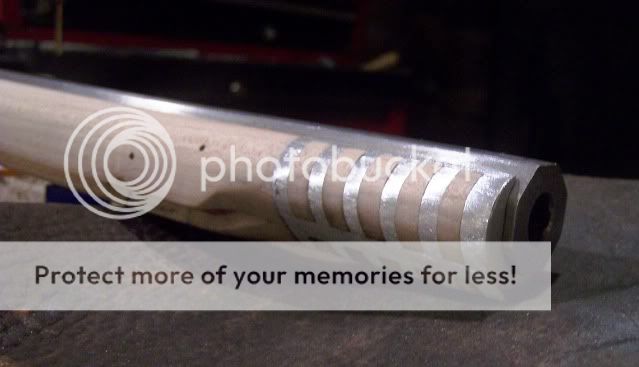
To get started you need the wood down to pretty close to where it needs to be.  Maybe a 1/16' of wood more than you need.  Leave some wood in case it scorches and then sand to final shape. 
Draw out your design and start inletting.  One of those Exacto saw blades comes in handy for cutting long straight lines.  Notice I have the parts to be removed colored in.  That will keep you from making a bad mistake.  I know.   :D


Once the wood is removed, color the inleted area with a #2 pencil.  This reportedly will help the pewter flow.  I don't know that for sure but I'm not taking any chances.  Getting it to flow is the name of the game.


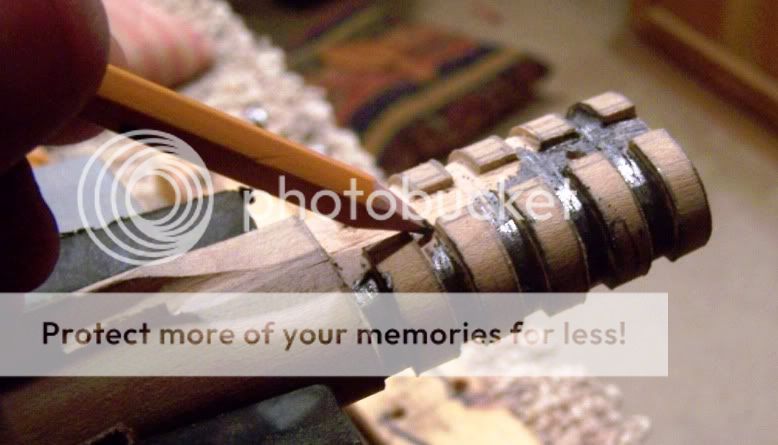
I then drill small locking lugs into the inletted area.  You wouldn't think it would need these but the pewter will shrink a little and I have had one that would rattle around a wee bit. 


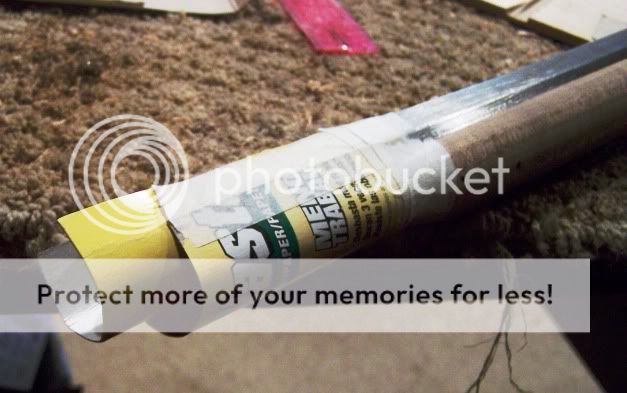
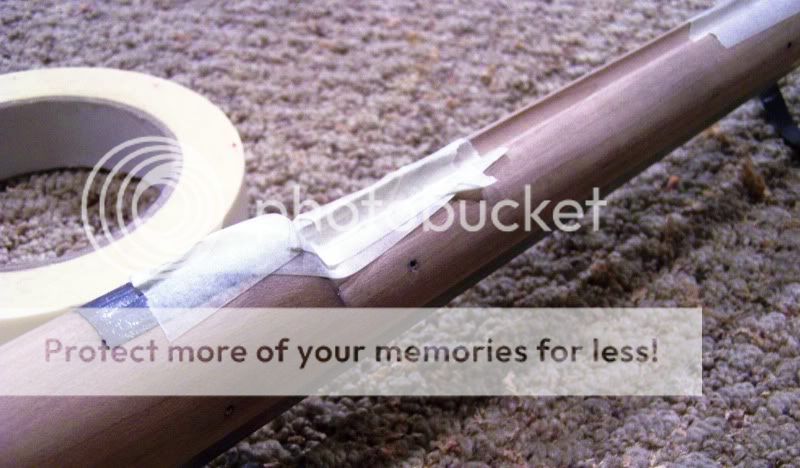
There's a bunch of ways to do this next step.  This is just the way I do it.  I take some thick card stock.  What you see is the cardboard wrapper that sand paper comes in.  Place it between the barrel and the stock.


Take a second piece of the same card stock and wrap around the area you plan to pour.


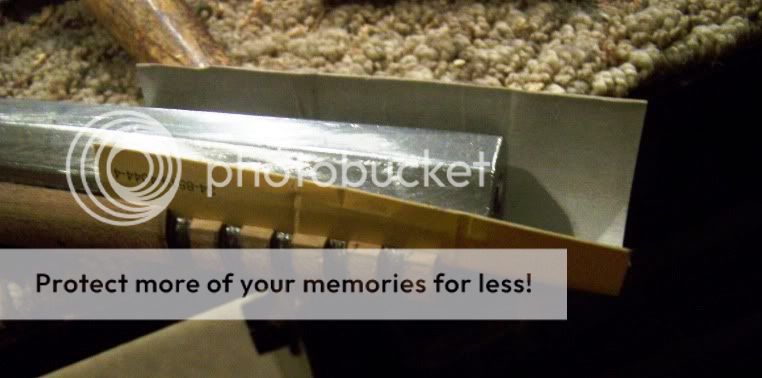
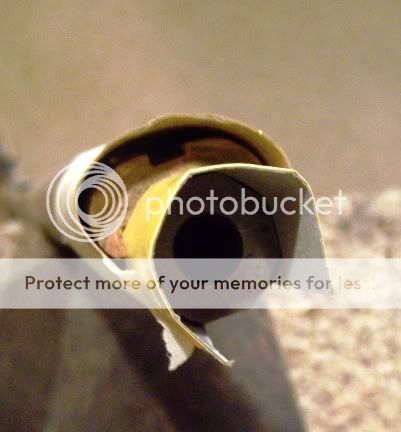
You can see that I leave extra space in the mold that has been made.  This will go a long way toward getting the pewter to flow into all the voids and make a nice clean pour.  I will also give you a work out when your trying to file and rasp everything off. 


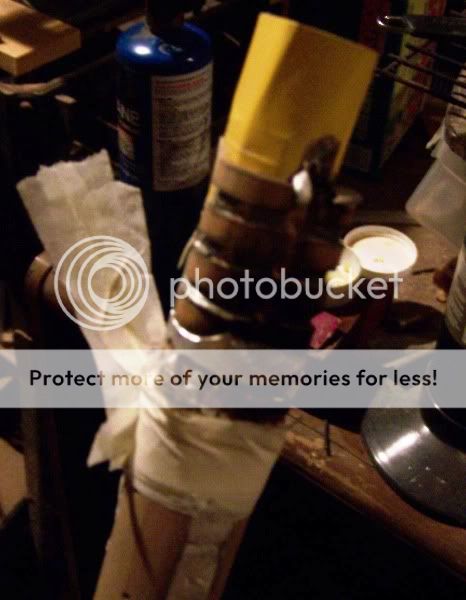
Wrap everything in masking tape.  When you think you have everything wrapped good, add some more tape.  We'll see why later.  I use modeling clay to seal every corner and place pewter might leak, like along the edge of the stock and the barrel.  You will notice I have filled in the inlet for my ram rod and barrel lug.  I also learned this the hard way.  Trust me.  If you have a spill or leak the pewter WILL go in the worst place possible. 


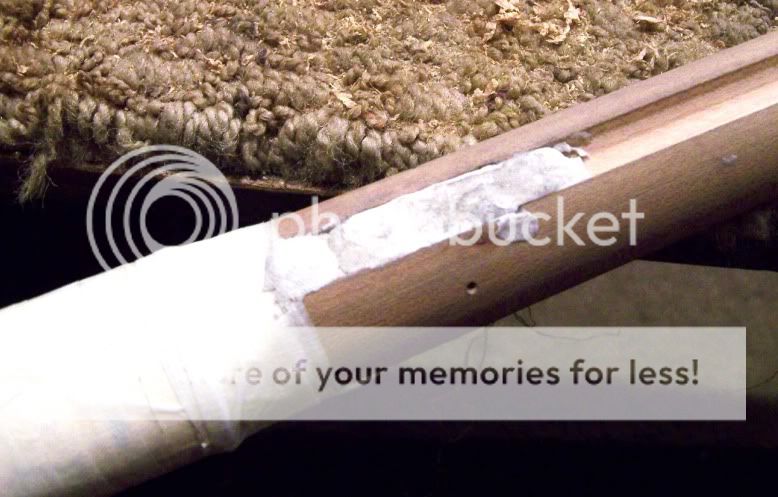
That includes right down the ram rod hole.  That gets taped over too.


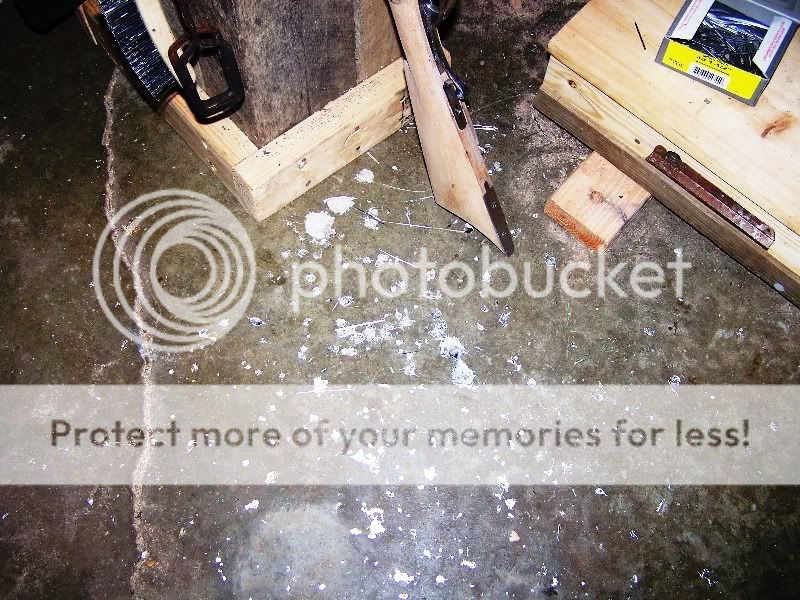
Your probably thinking, he's going on and on about the spills and leaks.  Here's a couple of pics to show you I'm not making it up. 


After al I did to prevent this it still happened, A leak!  All is not lost.  You can take a soldering iron or gun and heat sections and the pewter will fall out of the mortise.


Now the safety tip.  Wear long pants, long sleeve shirt, wear gloves and face protection.  I use a full face shield.  This shows how far the stuff will splatter when it hits something like that vice on its way to the floor.  My pants were covered with pewter splatters. 


OK, Back to the nose cap.  First, I heat a bolt and drop it down the barrel.  This will preheat the barrel and keep the pewter from shilling off when it hits the cold steel.


Make sure the bolt head is larger than the bore.  This will also keep a missed pour from going down the barrel.


Now heat your pewter.  This will give the bolt time to heat the barrel.  Unfortunantly it also makes the tape turn to goo.  This is the culprit for the above leak and spill.  A nessesary evil.  How much to heat the pewter?  You can get it too hot and it will scorch the wood.  Not hot enough and it will not pour.  I don't have a temp guage so I use a toothpick.  One of those round maple ones.  You should be able to put the toothpick in the melted pewter for a couple of seconds without it scorching/charring the toothpick.  I have observed that when it is too hot the surface of the pewter will get sort of a blue hue to it. 


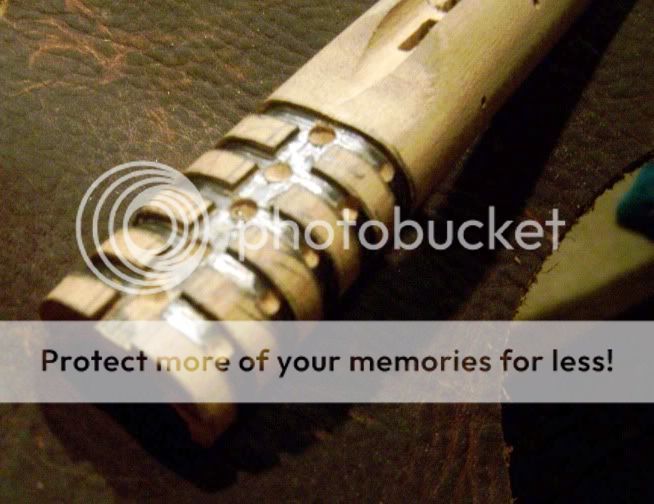
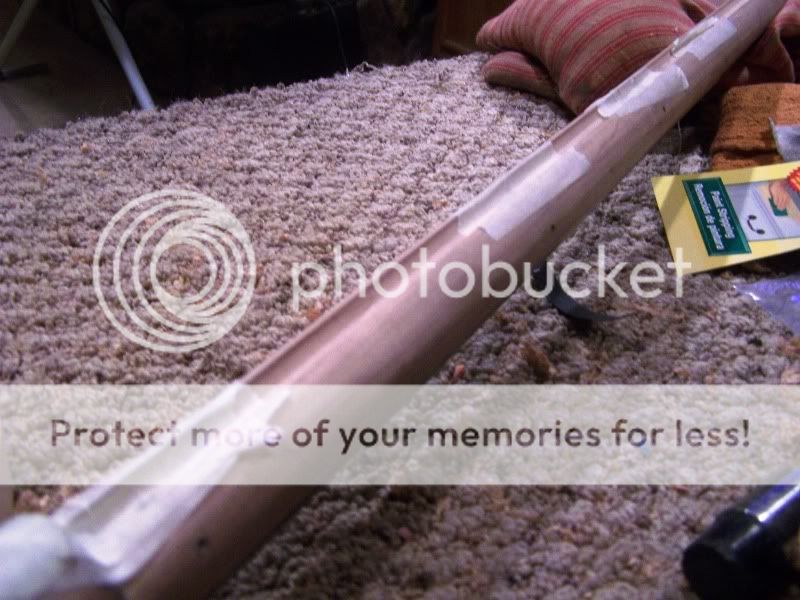
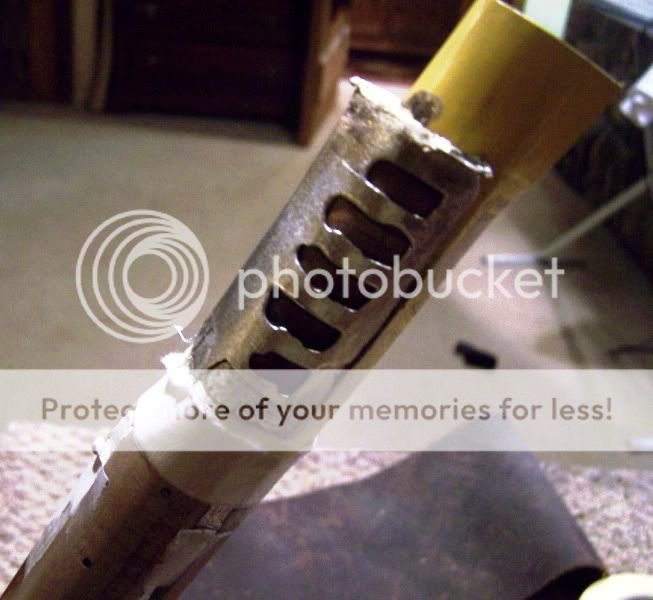
Here's what it looks like after the card stock and tape has been removed.  I'll bet you are thinking what a mess!  Get your rasp and files out.  Now the fun part begins.  Oh, you'll need some elbow grease too.


Finished Product.


« Last Edit: January 13, 2020, 09:58:18 PM by rich pierce »
Failure only comes when you stop trying.

billd

  • Guest
Re: Pouring a pewter nose cap
« Reply #1 on: May 05, 2009, 04:13:31 AM »
Ken,   Thank you very much.  Now how about one for a half stock?  ;D

Bill

Offline KentSmith

  • Hero Member
  • *****
  • Posts: 1005
    • Augusta Gunworks
Re: Pouring a pewter nose cap
« Reply #2 on: May 05, 2009, 04:20:04 AM »
KEn,  good tutorial.  The pencil lead does seem to help the flow.  I use a course cut file as it doesn't load as much and fast when removing the excess pewter.

I don't put the card under the barrel as I am afraid of pewter moving down under the barrel and filling up the lug mortise.  I do put a thin layer of clay under the barrel right beneath where the pour will reach to act as a dam to prevent pewter movement down the barrel channel.  Perhaps the card does the same.  Will try with the gun on my bench now.  Thanks

Offline VP

  • Sr. Member
  • ****
  • Posts: 320
Re: Pouring a pewter nose cap
« Reply #3 on: May 05, 2009, 04:36:27 AM »
Ken,
 Thanks for the tutorial as I am getting ready to pour my first nosecap. It is a half stock so perhaps another set of pictures from someone or yourself to show me any differences would be appreciated.

Offline Brian Jordan

  • Hero Member
  • *****
  • Posts: 548
  • Pennsylvania
Re: Pouring a pewter nose cap
« Reply #4 on: May 05, 2009, 04:38:41 AM »
Thank you for the tutorial Ken, I will be pouring my first pewter bolster on a knife I am working on. The pictures are very helpful.
Elizabeth, PA

"No free man shall ever be debarred the use of arms"...Thomas Jefferson

Let's Go Brandon!

Offline Ken G

  • Hero Member
  • *****
  • Posts: 5526
  • F & AM #758
Re: Pouring a pewter nose cap
« Reply #5 on: May 05, 2009, 04:55:48 AM »
Thanks guys.  Sounds like the posting was timely.  I hope someone will post some pics of a half stock pour along with this.   
Kent,
I have done the same with the clay in the barrel channel to seal it off.  I have become very paranoid about it getting in the barrel lug inlets.  Had it happen one time and had to make a teeny tiny chisel to dig out.  what a pain. 
Ken
« Last Edit: May 05, 2009, 04:56:37 AM by Ken Guy »
Failure only comes when you stop trying.

Online acorn20

  • Hero Member
  • *****
  • Posts: 522
Re: Pouring a pewter nose cap
« Reply #6 on: May 05, 2009, 05:00:32 AM »
Great tutorial Ken.  Thanks for the pictures.
Dan
Dan Akers

Offline KentSmith

  • Hero Member
  • *****
  • Posts: 1005
    • Augusta Gunworks
Re: Pouring a pewter nose cap
« Reply #7 on: May 05, 2009, 05:25:40 AM »
Ken, had the problem more than once, as I am a slow learner, and paranoia isn't strong enough a word for it.  I also fill up the first lug mortise now.

I've followed the same basic procedure for halfstocks but heated the barrel with a torch rather than using a heated bolt.  Used a file to contour properly.

Offline Ken G

  • Hero Member
  • *****
  • Posts: 5526
  • F & AM #758
Re: Pouring a pewter nose cap
« Reply #8 on: May 05, 2009, 05:45:38 AM »
The first ram rod mortise and the first barrel lug are both filled with clay on mine.  The others mortises have masking tape over them.  I have even went as far as wrapping the entire stock with a large piece of paper before.  Looked like it had a tee-pee built around it. 
Seems like Dennis Glazener posted about pewter getting in a barrel lug mortise or something on one his guns.  It must be some sort of right of passage. 

Ken
Failure only comes when you stop trying.

Offline Ben I. Voss

  • Sr. Member
  • ****
  • Posts: 346
Re: Pouring a pewter nose cap
« Reply #9 on: May 05, 2009, 06:08:19 AM »
On the one and only pewter nose cap i tried to pour, about 25 years ago on a half-stock, the pewter got away from me and went down the ramrod hole and into the lock mortise- disaster would be an understatement!! I broke most of the locks internals by trying to knock it loose with a drift-punch through the lock bolt hole- the trigger and it's plate are still locked in their mortise. Oh yeah- and I cracked the stock too. I guess the moral of the story is to plug the ramrod hole really well and don't get the pewter too hot. Paranoia is probably a good thing in this instance!

Offline Roger Fisher

  • Hero Member
  • *****
  • Posts: 6805
Re: Pouring a pewter nose cap
« Reply #10 on: May 05, 2009, 05:13:22 PM »
I would add that when cutting the mortice to pour make certain they are not too shallow to prevent  chilling the pour and not filling.      Also undercut your cut grooves a tad to help her grip! ;)
« Last Edit: May 05, 2009, 06:14:39 PM by Roger Fisher »

Offline deano

  • Full Member
  • ***
  • Posts: 163
Re: Pouring a pewter nose cap
« Reply #11 on: May 05, 2009, 06:01:24 PM »
I got a hint from someplace to cut a piece of wood in an octagional shape and use it in the barrel channel instead of the barrel.  This prevents the big heat sink effect of a cold metal barrel has on the molten pewter.

On a straight octagon barrel it is an easy couple of cuts on a table saw with a piece of scrap 2X4. I made for a smooth pour and didn't require heating the barrel and  was one less thing to mess with.

Ken

Online Robby

  • Hero Member
  • *****
  • Posts: 2592
  • NYSSR ―
Re: Pouring a pewter nose cap
« Reply #12 on: May 05, 2009, 06:54:45 PM »
Ken , Nice job. I like the idea of the hot bolt down the bore. I use copper foil instead of the cardboard and heat the whole thing with a heat gun. The hot bolt will reduce the use of the heat gun considerably, Thanks!
Robby
molon labe
We the people are the rightful masters of both Congress and the courts, not to overthrow the Constitution but to overthrow the men who pervert the Constitution. A. Lincoln

Offline Ken G

  • Hero Member
  • *****
  • Posts: 5526
  • F & AM #758
Re: Pouring a pewter nose cap
« Reply #13 on: May 06, 2009, 05:54:08 AM »
I wish I could take credit for the bolt idea but one of the House bros. beat me to it.  I understand its in one of their tapes. 
Ken
Failure only comes when you stop trying.

Offline Rolf

  • Hero Member
  • *****
  • Posts: 1730
  • There's more than one way to skin a cat.
Re: Pouring a pewter nose cap
« Reply #14 on: May 06, 2009, 10:10:41 AM »
Great tutorial. Please Ken, could you move it to the tutorial section so it does not get lost?

Best regards

Rolfkt

Offline Tim Crosby

  • Administrator
  • Hero Member
  • *
  • Posts: 17988
  • AKA TimBuckII
Re: Pouring a pewter nose cap
« Reply #15 on: May 06, 2009, 03:37:46 PM »
 Great tutorial Ken, I wish I had a cap that needed pouring, I like pouring stuff, lead or pewter. Started when I was a kid  with lead soldiers, progressed to sinkers, balls, knife bolsters, rifle caps and powder horn tips/inlays. Even poured it down an ant hole once, make a pretty neat paper weight.     

Tim C.

Offline Tim Crosby

  • Administrator
  • Hero Member
  • *
  • Posts: 17988
  • AKA TimBuckII
Re: Pouring a pewter nose cap
« Reply #16 on: May 07, 2009, 01:20:22 AM »
   Dang ken, I got so wound up that I melted my latest auction buy, some kind of an award, had some engraving on it, big sucker, down into a nice sheet...now...what can I make with it?

Tim C.

Birddog6

  • Guest
Re: Pouring a pewter nose cap
« Reply #17 on: May 07, 2009, 03:11:29 PM »
Nice job Ken, well thought out & easy to follow instructions.   ;) 

I have no doubts I can spill it everywhere now....... ha ha ha ! ;D  In fact, I think I will just spill it right off the bat & just get that part out of the way  ! ???

Offline t.caster

  • Hero Member
  • *****
  • Posts: 3660
Re: Pouring a pewter nose cap
« Reply #18 on: May 08, 2009, 07:35:02 PM »
Ken, I like your tutorial, but wonder...if you put thatcardboard around your barrel, why do you need to preheat the barrel at all? No cold metal to chill the pewter. I have just put a layer of masking tape along the barrel with good results instead of cardboard. I use a fairly small ladle with a nice small pouring lip for a pretty well controlled pour and very little or no spillage.
Tom C.

Offline Ken G

  • Hero Member
  • *****
  • Posts: 5526
  • F & AM #758
Re: Pouring a pewter nose cap
« Reply #19 on: May 08, 2009, 08:51:25 PM »
Tom,
My thoughts are the warmer you can get everything the better your chances of getting a 100% flow / pour.  Anything that chills the pewter is the enemy. It's not bad in the summer but I pour in my garage and the temps are pretty cold on the mountain during the winter.  Dropping the bolt down the barrel not only heats the barrel but the paper, wood and I think the air inside the cavity.  All of it will be hot enough to make it uncomfortable to the touch except on the fartherest away part of the mold from the barrel.  So if the air temp is 30 or 40 degrees I have to be heating it up a good bit.  I even take a second torch and heat the lip of the melting pot to try and keep the pewter at flow temp a little longer.   
I've tried about anything that I think will help get that 100% flow.  Now I don't know what helps and what doesn't but I have a routine that I follow each time like the pencil lead and the bolt.  Now I'm scared to change.
« Last Edit: May 08, 2009, 08:54:01 PM by Ken Guy »
Failure only comes when you stop trying.

Offline t.caster

  • Hero Member
  • *****
  • Posts: 3660
Re: Pouring a pewter nose cap
« Reply #20 on: May 08, 2009, 09:23:07 PM »
Ken, that's all true...points well taken!
Tom C.

Offline G. Elsenbeck

  • Hero Member
  • *****
  • Posts: 1220
Re: Pouring a pewter nose cap
« Reply #21 on: May 09, 2009, 06:22:37 AM »
Ken, great tutorial on this subject.  I'm sure the basic methods will work on just about project on the table.  I guess the truth is to keep yer flowin.  And nice use of graphite or pencil lead.  Will definitely keep going over this excercise again.  Thanks for your efforts!
Gary
Journeyman in the Honourable Company of Horners (HCH) and a member in the Contemporary Longrifle Association (CLA)

There is a very fine line between "hobby" and "mental illness."